 Deutsch
Media Section
In this lesson, we will show you the most important tips and tricks for working with the "Media" area.
Media Section
1. Create a media file
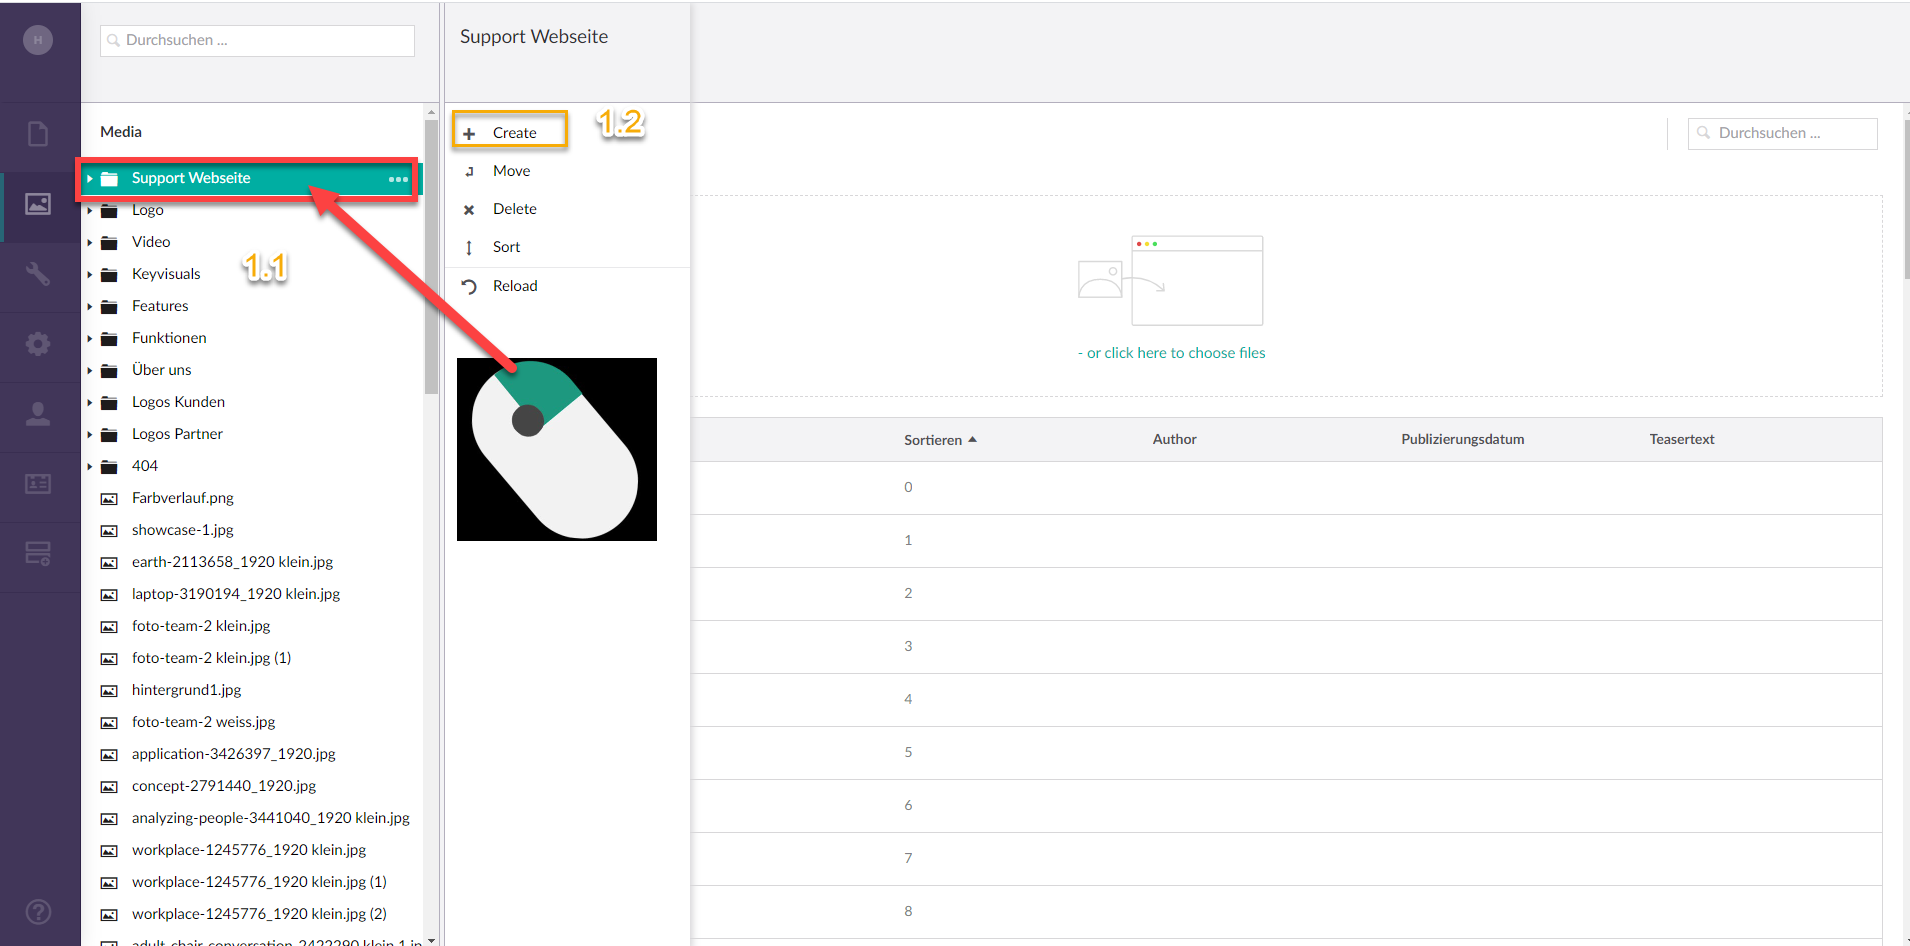
1.1 First of all, it is important to know that you can easily create a new folder with a right click on the place you want to place it.
1. 2 Than the edit folder opens and you can choose "create"
1.3 Now you cn shoose eighter if you want to upload a image/file or create a folder
2. Edit a folder
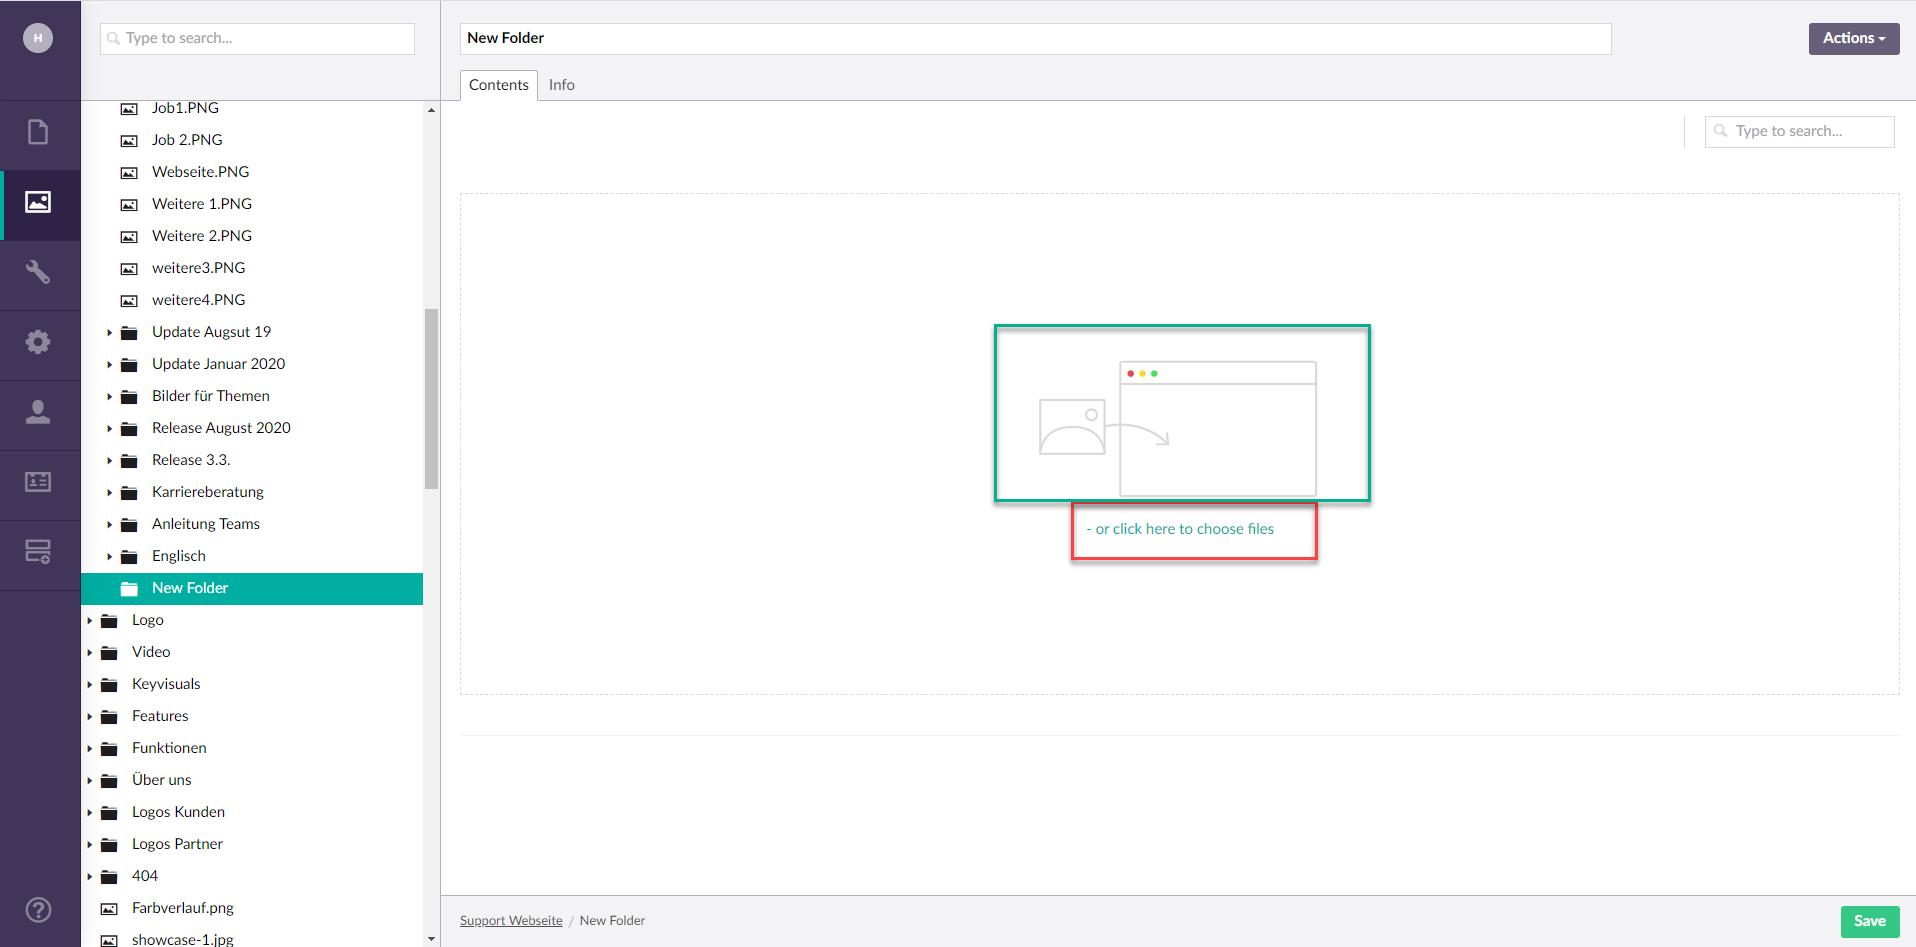
First you have to name and save the folder, then you can edit it.
Click on the Actions button an than on Create. So you can Edit the folder you created.
In folders, you can either create subordinate folders or store media. Everything from images to videos to PDF and Word documents is possible. For example, you can display images directly on the website, while a PDF document can be linked for viewing.

3. Upload media
Media can also be dragged directly into the green marked area or selected and uploaded to your storage via the label "click here to choose files".
Everything from images to videos to PDF and Word documents is possible. For example, you can display images directly on the website, while a PDF document can be linked for viewing.
4. Edit Media
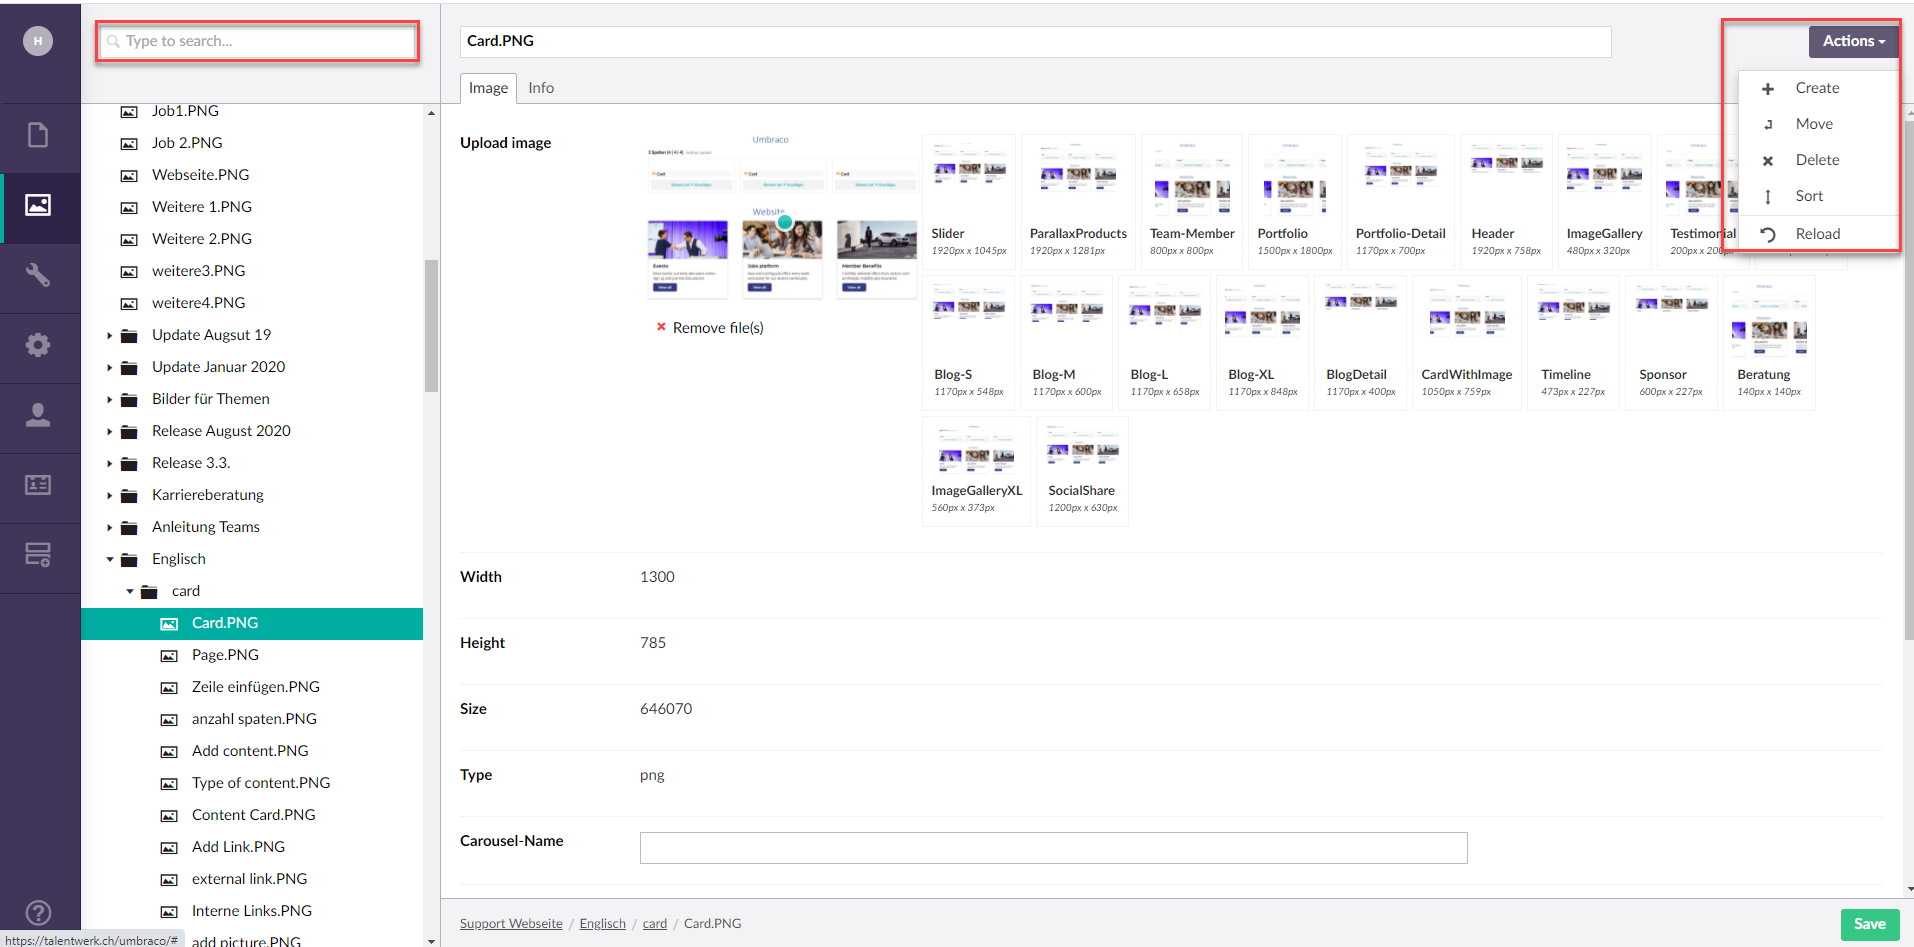
Uploaded media can be selected by you and quickly deleted using the "delete" action or simply moved to another folder using the "move" action. In addition, media can be found quickly using the search function.
5. Separat URL Link for files
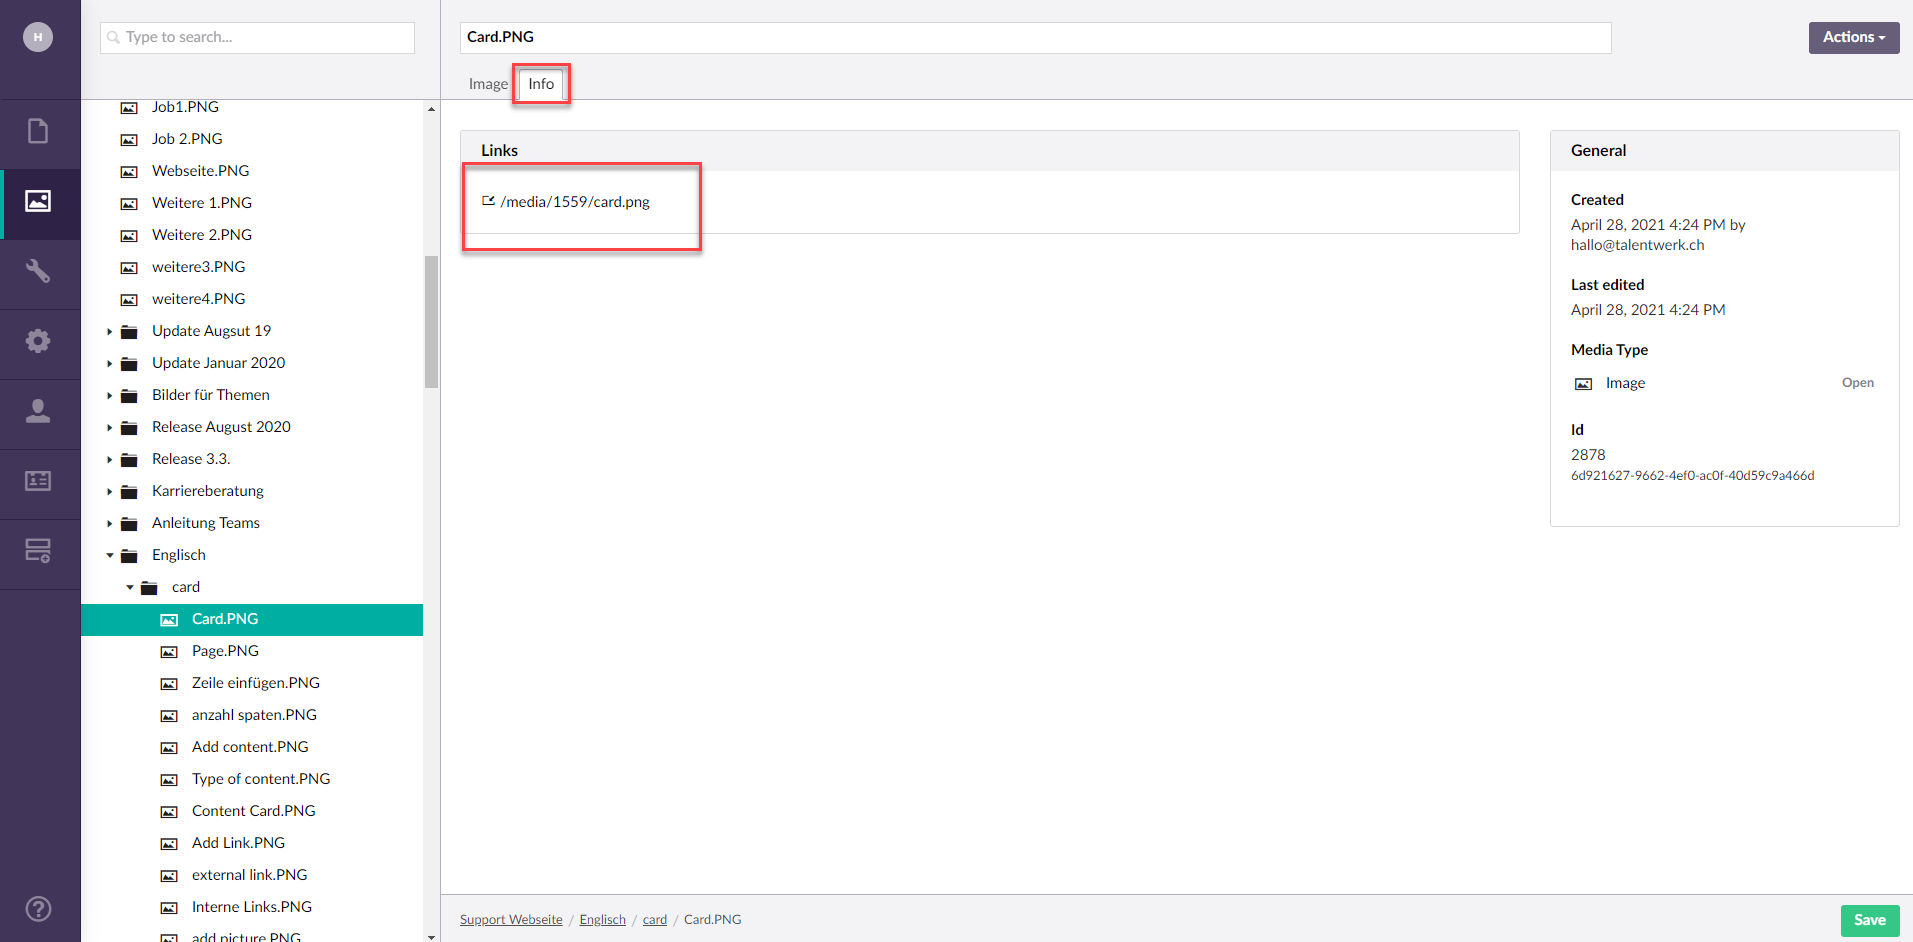
One advantage of online deposited files is that they are assigned with a link. With this link, you can open the file in a separate window or store or link it in the CRM, for example. To call up this link, click on the name of the stored medium below. Now switch from the "Image" tab to the "Info" tab, where you will find the last part of the link. Click on it to display the file in the web browser. Now copy the link and use it in CRM, for example, if you want to create a job and attach a job advertisement in PDF format to it. It would also be possible to link a PDF or Word file on your website, for example. This is explained briefly in the following steps.
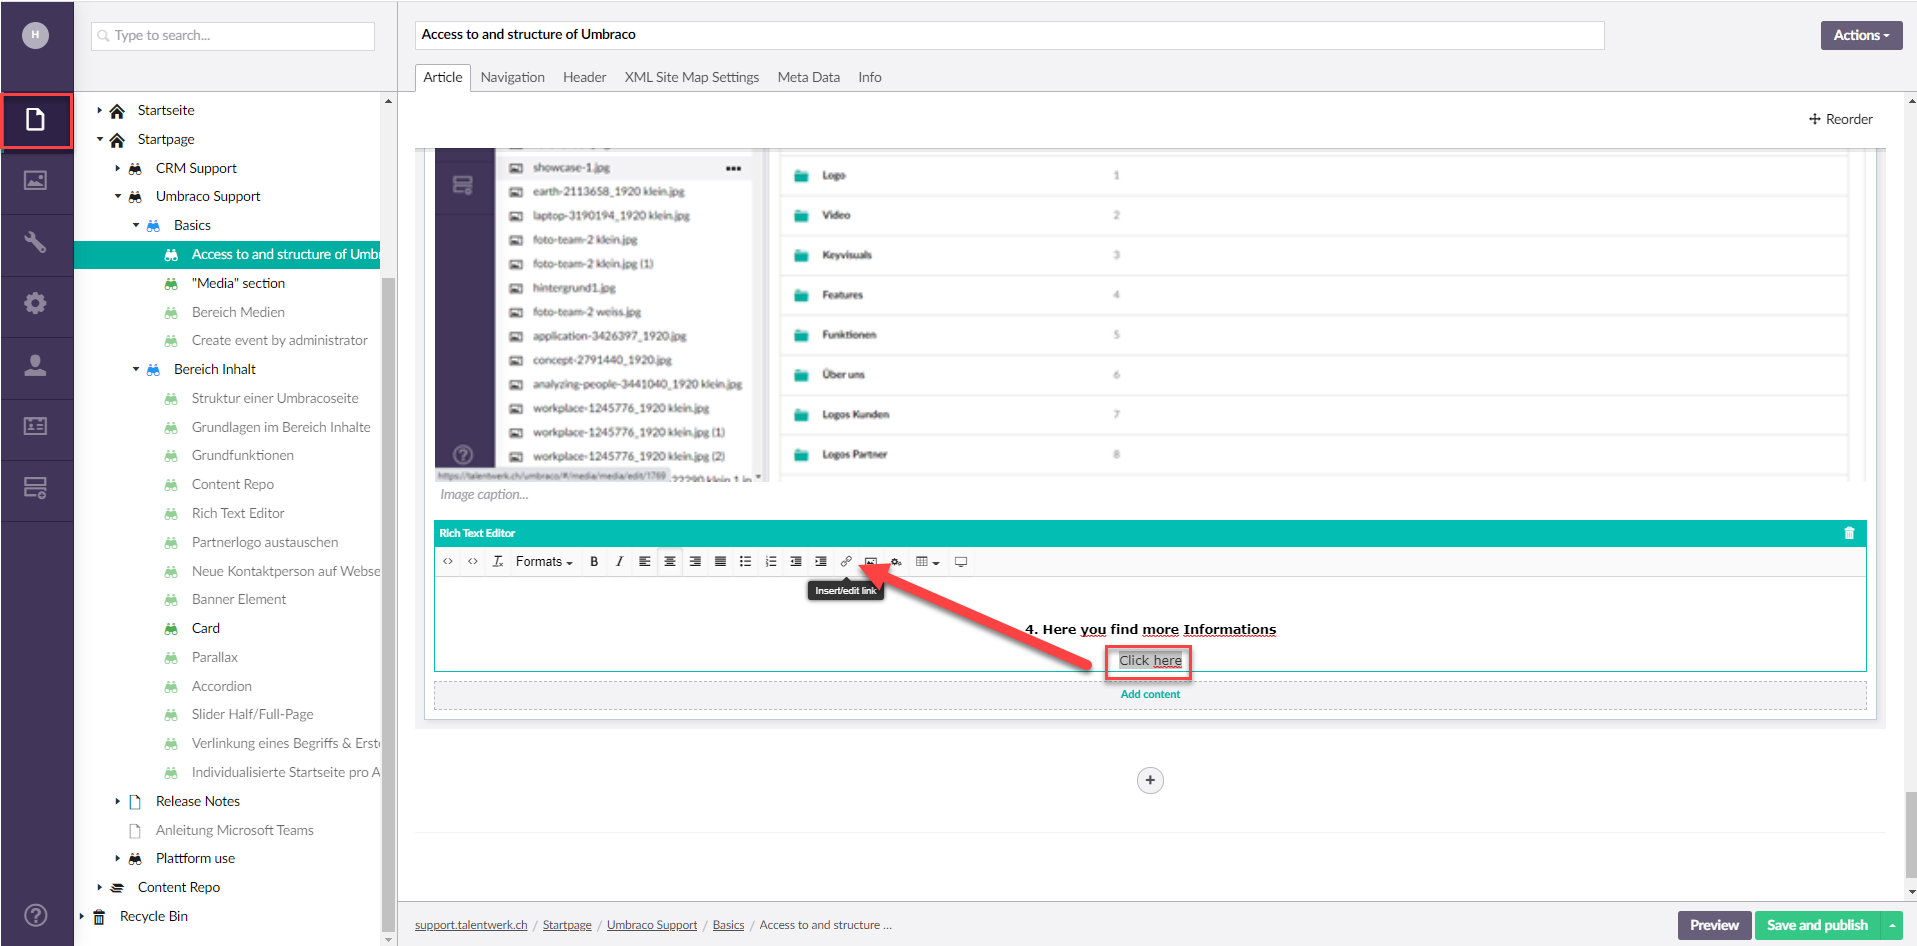
6.1 Insert link
First you have to copy the link of the desired file in the Media area, as described before. Then switch to the Content area and select your desired page. Now select one or more words or an image and click on the bracket.
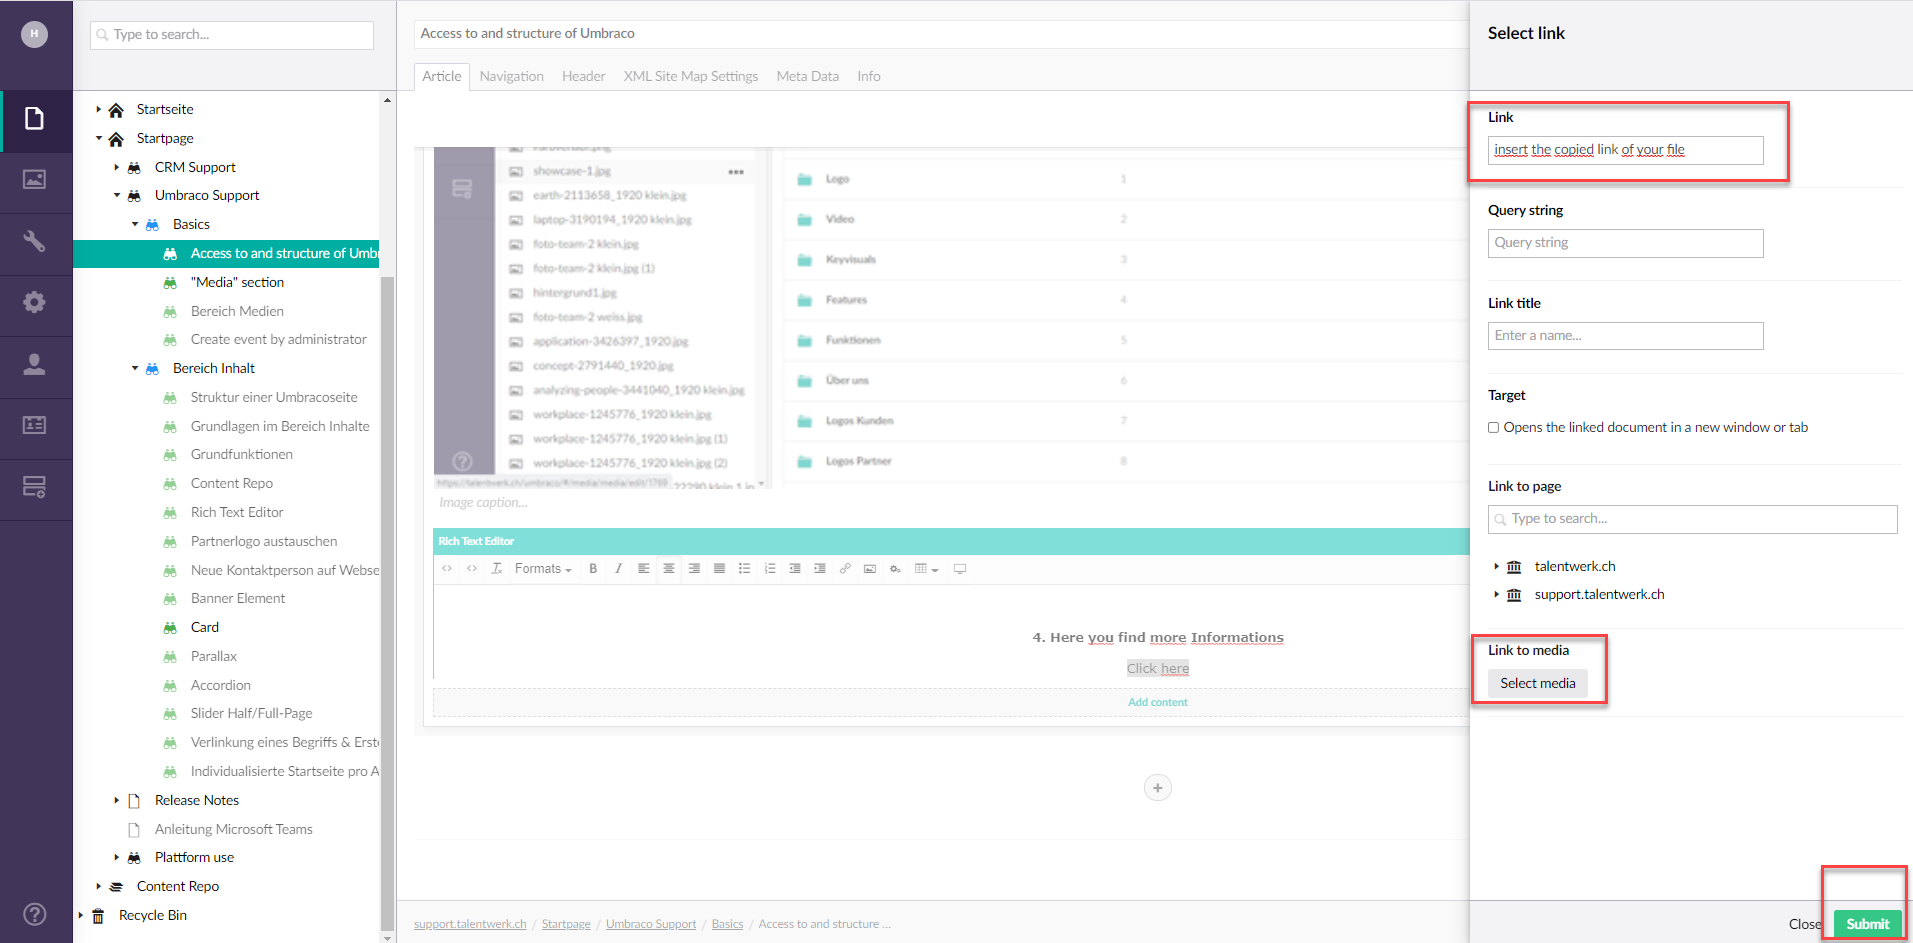
6.2 Submit the link
In the new window, paste the link and save the changes. Another variant would be - without copying the link - to select the file directly via the "Select media" button. A visitor to the website will now be redirected to the document when she clicks on the picture or the marked words. In this way, you can link all files stored in the media section.
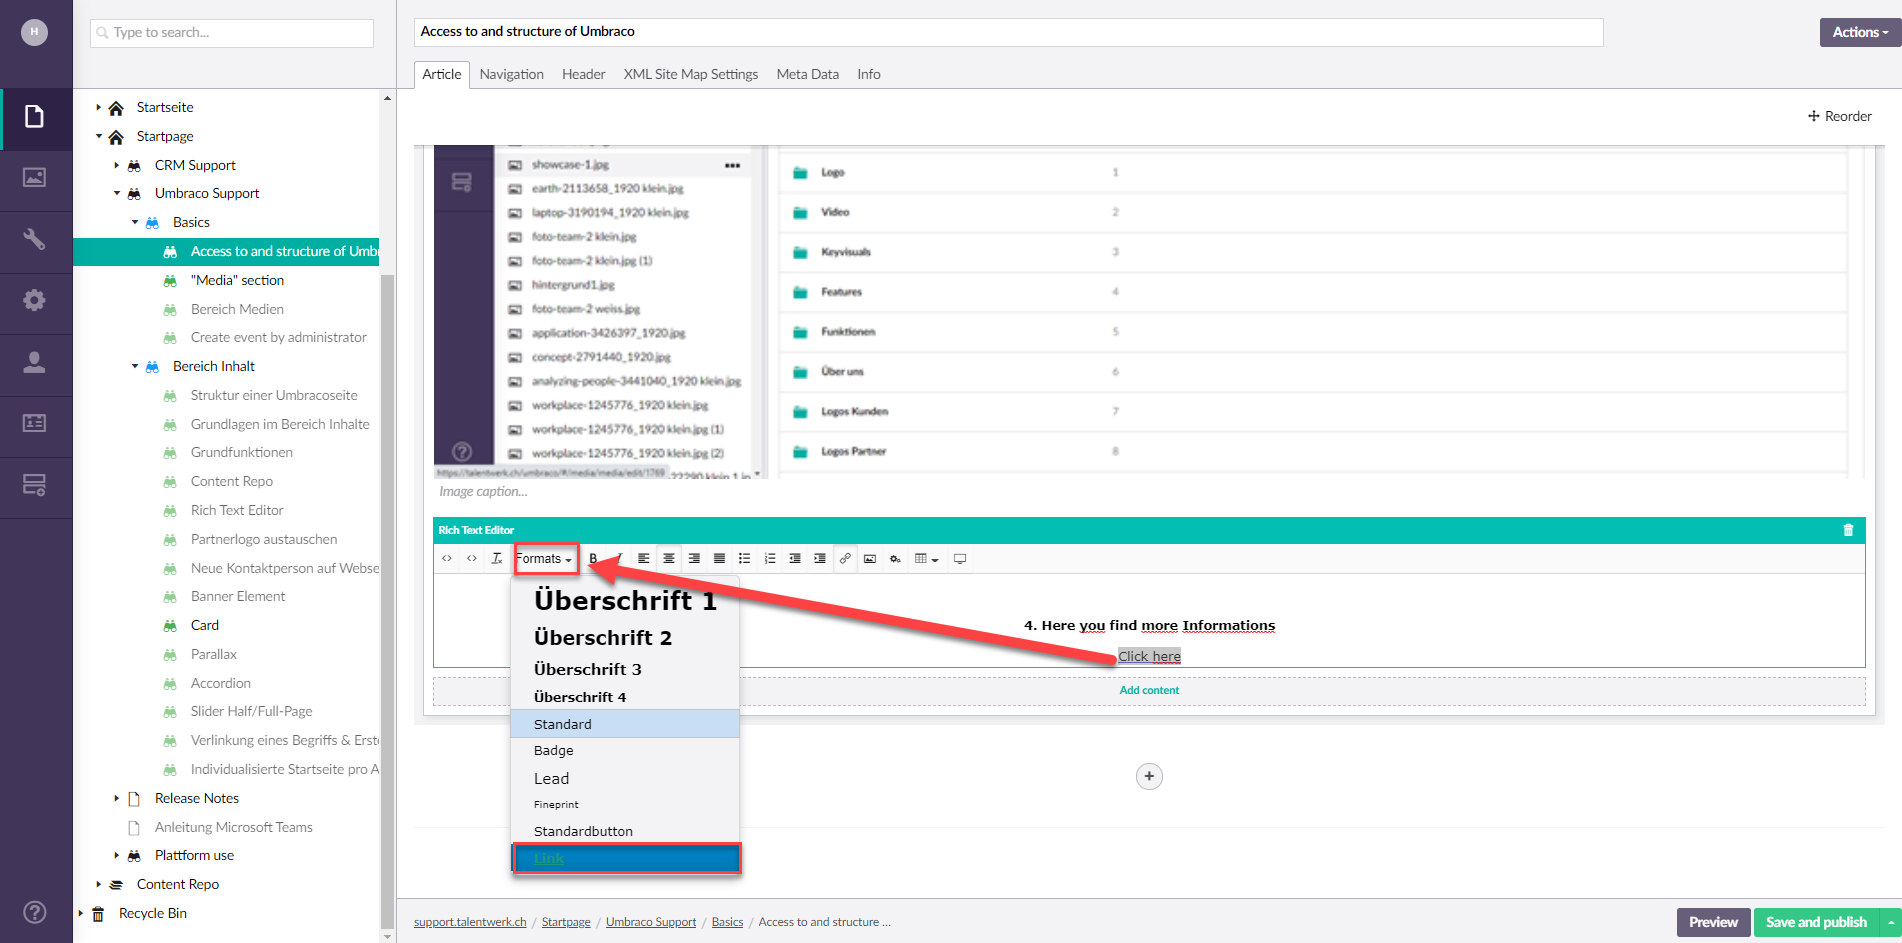
6.3 Highlight as link
If you want the text to be highlighted as a link, select the "Link" format.
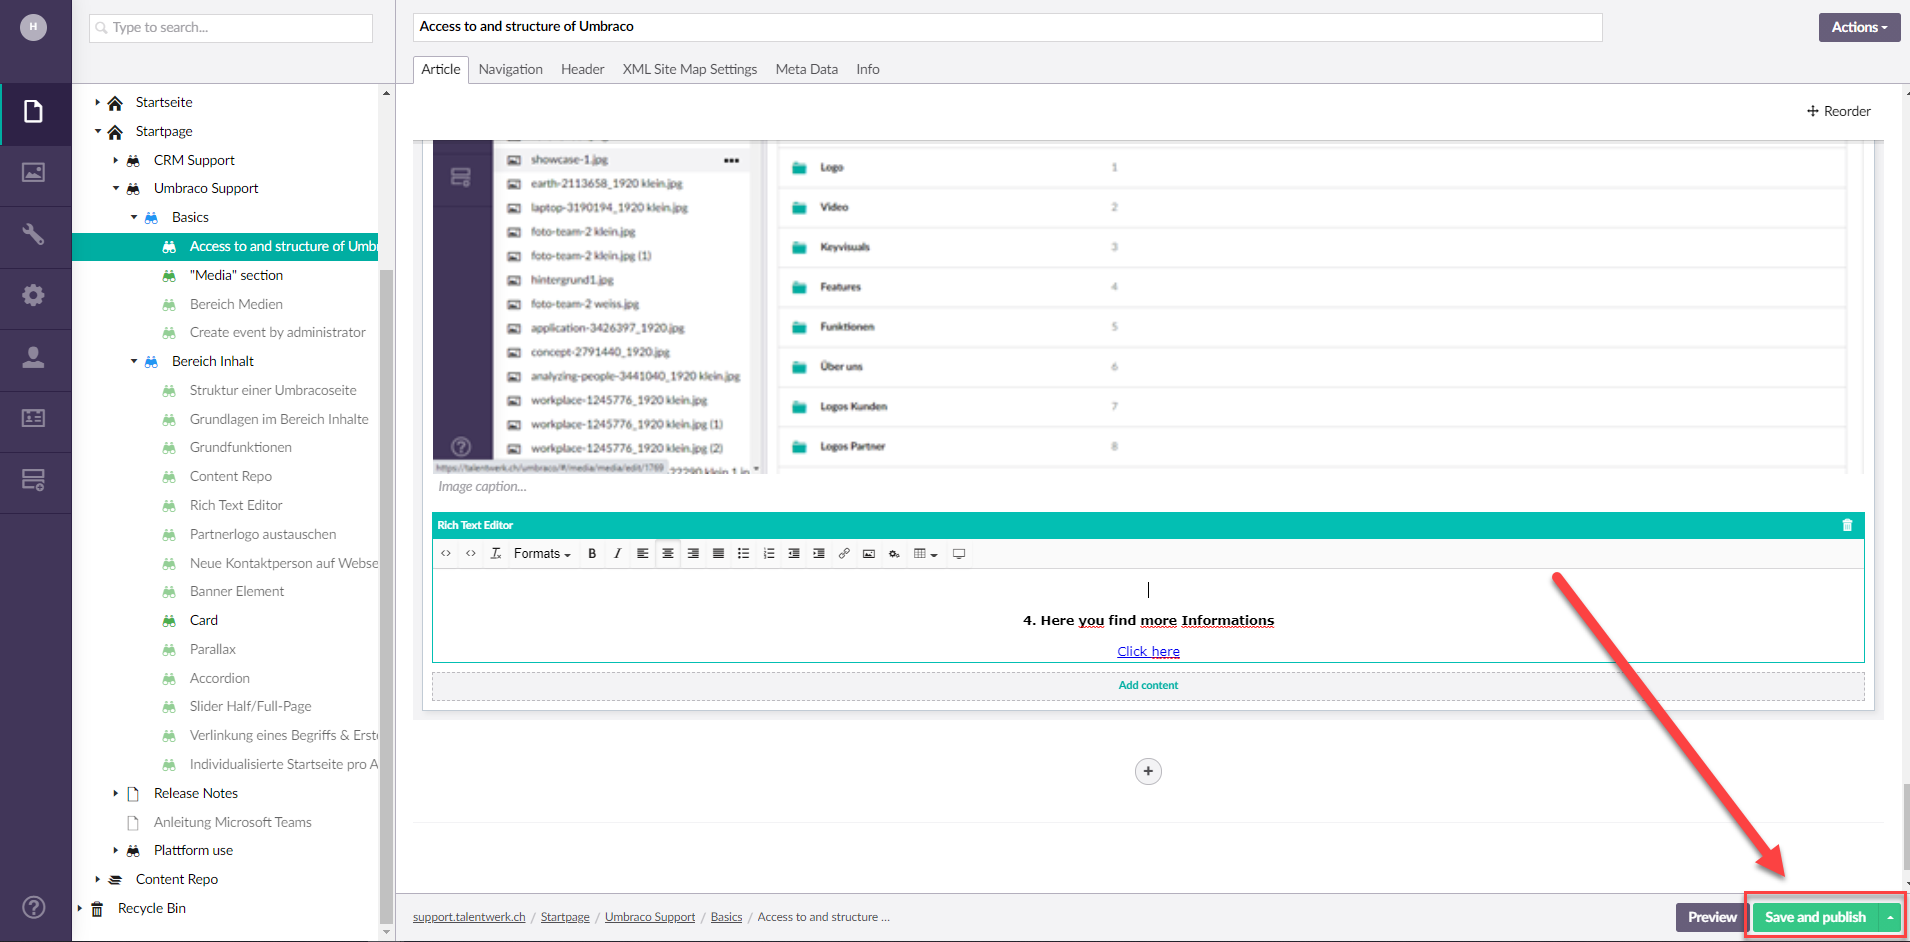
7. Save and publish
At the end of this action, do not forget to save and publish the page.
Weitere Artikel
Replace partner logo
In this instruction we explain how you can add a new partner or exchange parts of the information of an existing partner.
Read moreAccordion
In this instruction we explain the function and the handling of the element "Accordion".
Read moreStructure of a page
In this instruction we will explain the structure of an umbraco page and give you some basic tips on how to work with an umbraco page.
Read more