Basic functions
In this instruction we will explain how to create, delete, move, copy, sort and more pages and subpages in your Umbraco.
Basic functions
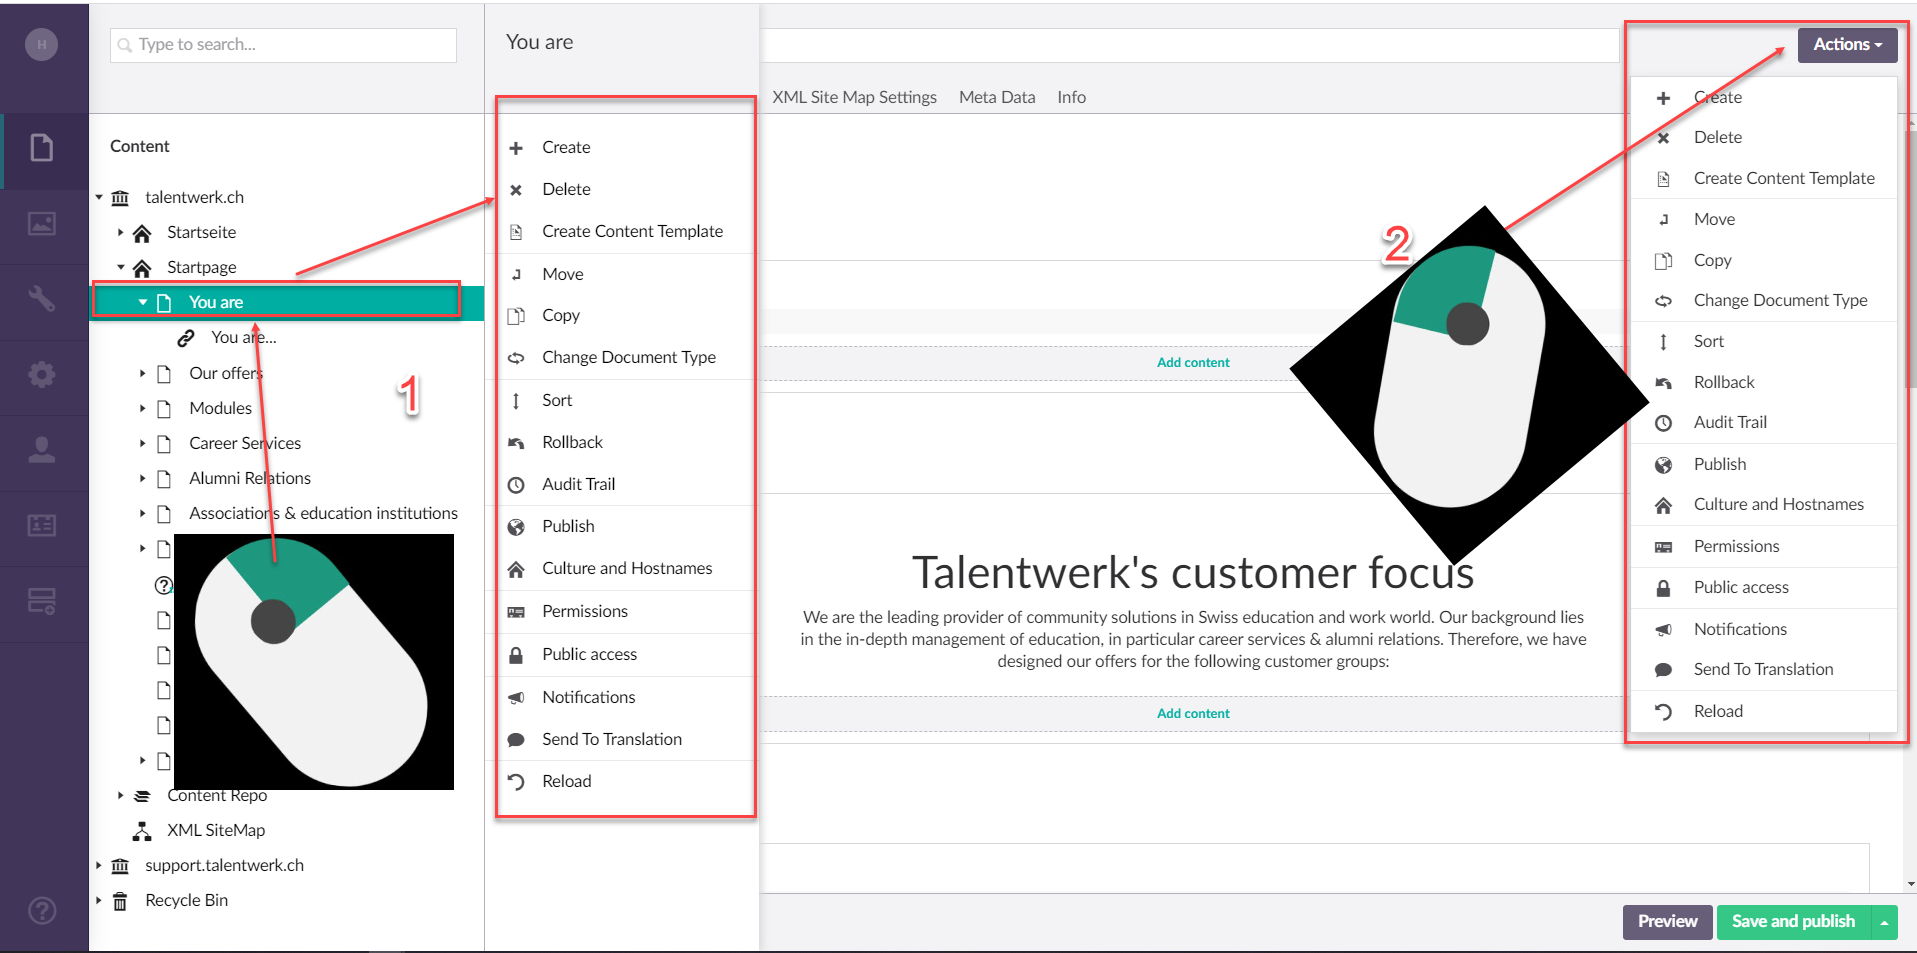
1. How to open the functions
|
Now you can see all the actions you can take, but not all of them are relevant to you. In this instruction, all relevant ones are briefly looked at and shown how you can use them.

2. Create
First we look at the Create action, which allows you to create a new page. This can either be a main page, which you can expand or collapse by clicking on the arrow, whereby all sub-pages appear.

3. Delete
With the delete action you can delete main pages with all sub-pages or individual sub-pages. The deleted pages are moved to the recycle bin and can be permanently deleted from there

4. Restore
From the recycle bin, the page can be reactivated by the "Restore" action.

5. Move
Using the Move action, you can subordinate a main page or subpage to another page and thus place the desired page differently in the structure.

6. Copy
The copy action is extremely useful if, for example, a page is to be translated, as the page can be copied with all its elements and then only the text needs to be changed. Here the option "Include descendants" can be selected if it is desired that all sub-pages are also copied, otherwise this option can be deactivated. A (1) is added to the end of the name of the copied page, but you can change this. In addition, the page is not published for the time being, but has yet to be published.
In the content you can simply select under which page you want to copy it in

7. Sort
The Sort action is very helpful when the structure of the web page is to be changed. For example, when a new page is created, it is automatically displayed as the last page, but if it is to be displayed in first or second place, the order can be changed with the Sort action.

8. Rollback
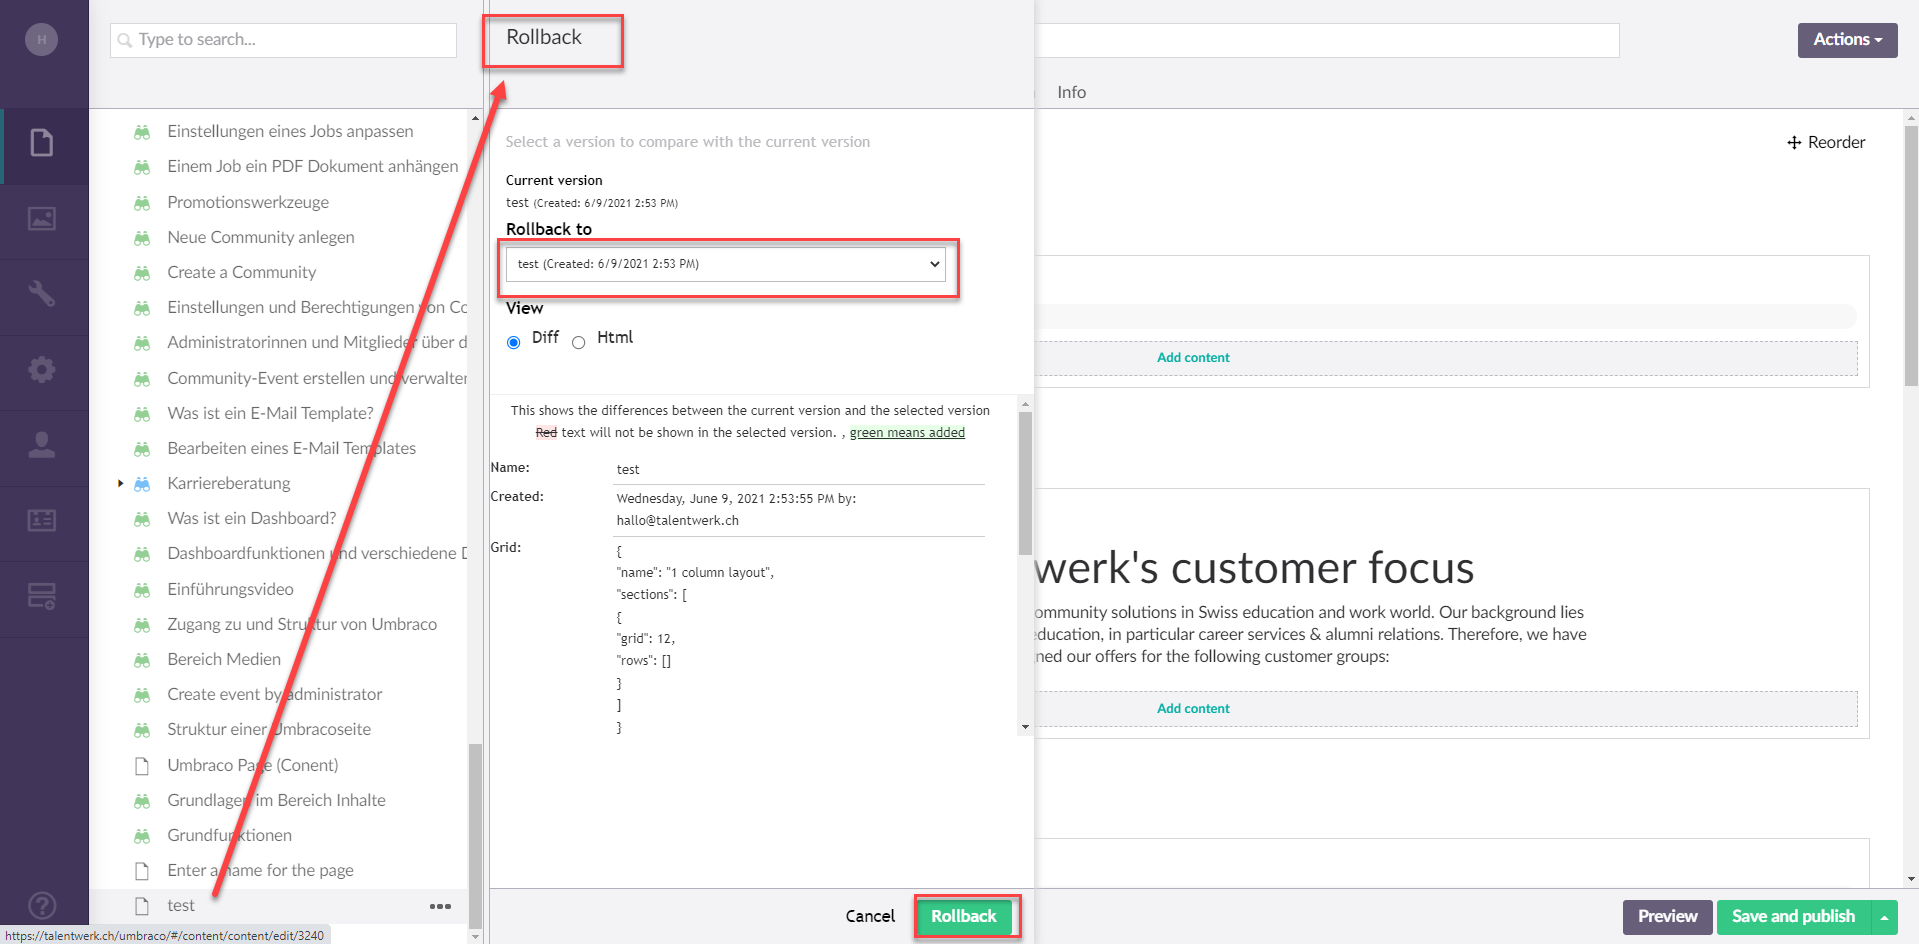
Next, the Rollback action can be used to select an earlier version of the page and undo all subsequent changes. This is very useful if, for example, changes have been made to a page by mistake and these should be undone without much effort. After selecting Reset, you can easily select the desired version and reset it to that version.

9. Public access
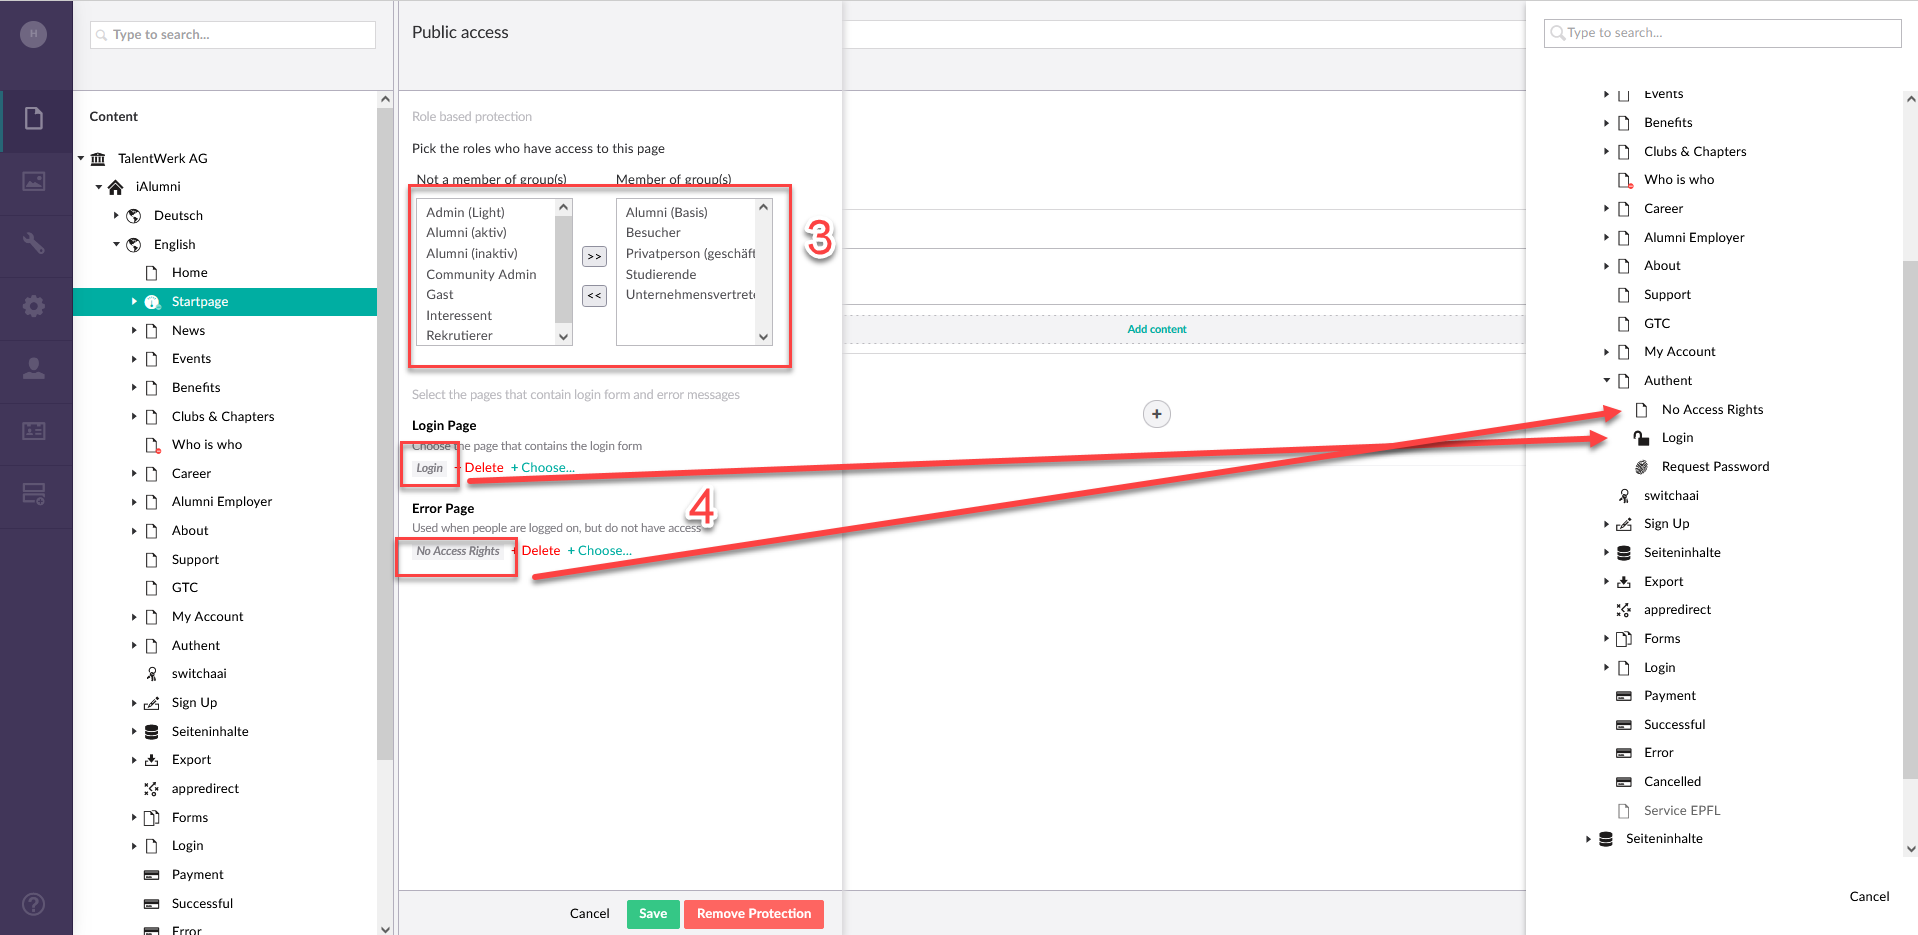
Finally, the "Public Access" action can be useful if only certain app roles should have access to a page. For example, you can specify that only company representatives have access to the "Manage Jobs" subpage. This is actually already configured for you by TalentWerk AG staff and you do not need to make any changes to it. You only need this action if you copy a page, as this setting is not adopted. The following example briefly explains how you would then proceed.
|

Weitere Artikel
Slider Half/Full-Page
In this instruction we explain the function and the handling of the elements "Slider Fullpage" and "Slider Halfpage". The only difference between these two is their size.
Read moreSet up individualised page per app role
In this instruction we explain how you can set up individualised pages for different app roles and personalise them according to the needs of the stakeholders.
Read more Deutsch