Advanced search
Learn how to create an Advanced Search here.
Advanced search queries offer you the possibility to search for data very specifically and to narrow it down to a time period, for example.
To create your advanced search query, open the filter icon in the top right-hand corner of the CRM.
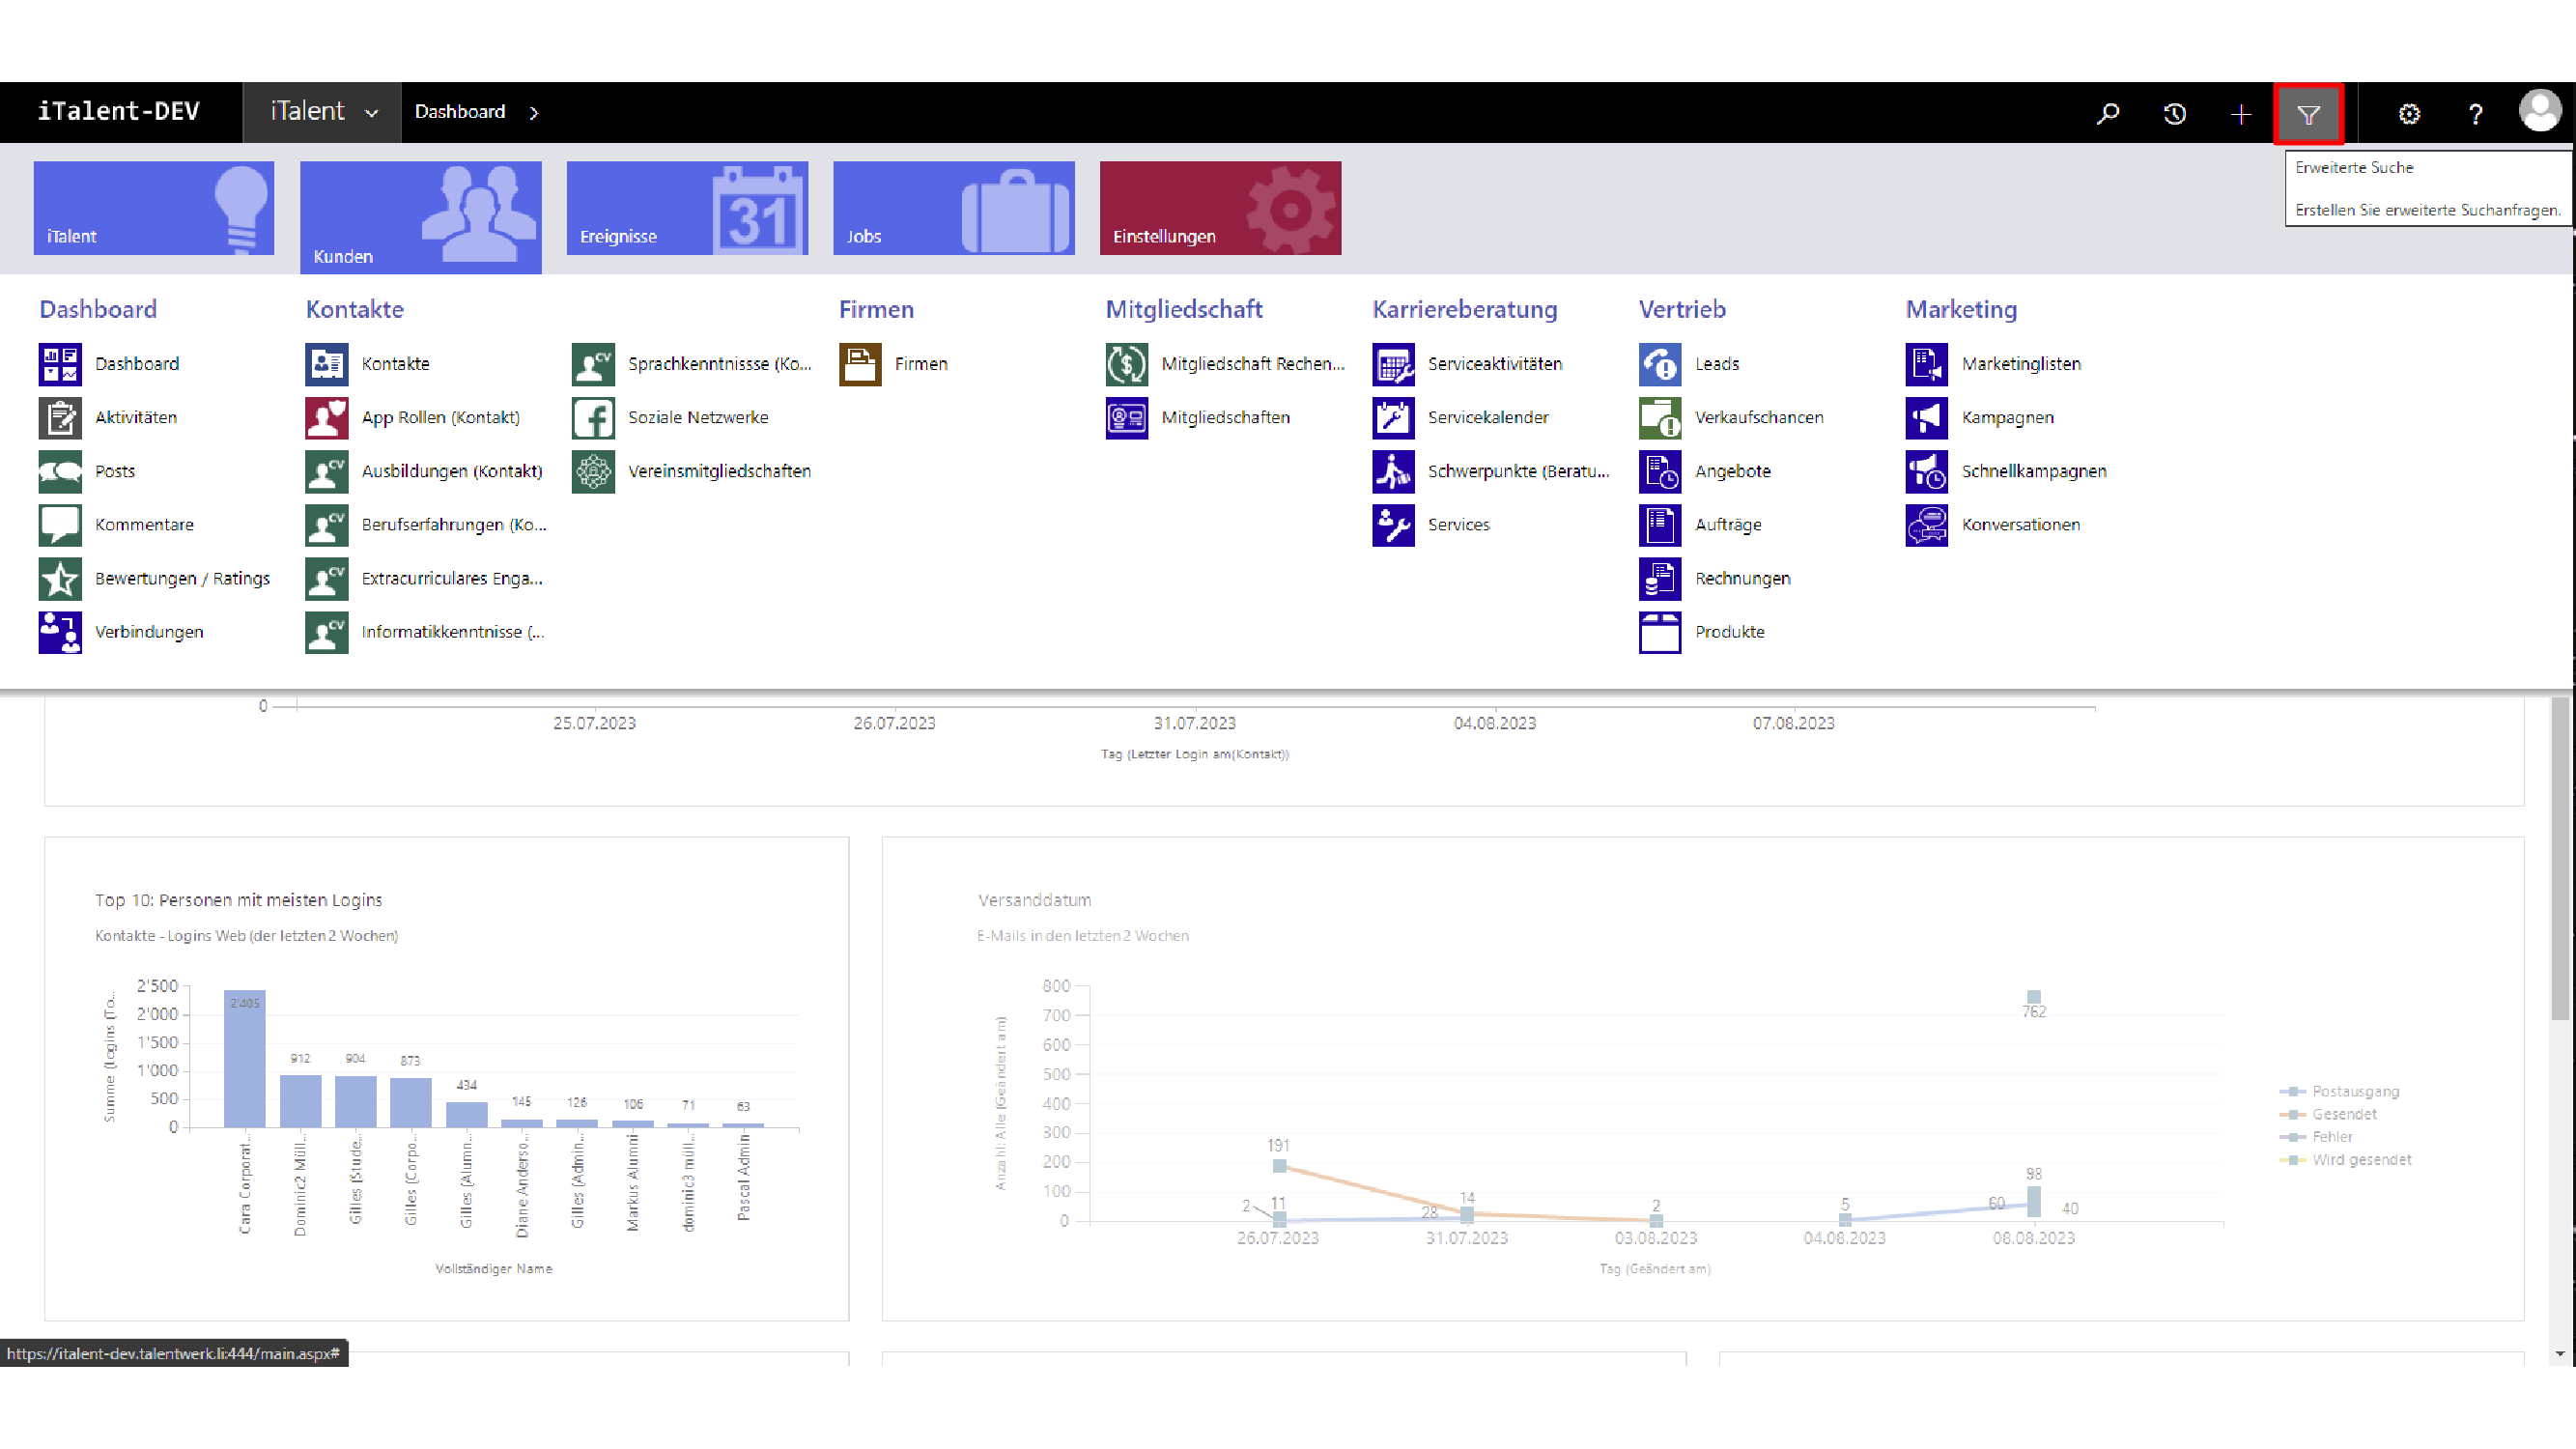
This opens a new window where you can now create your query.
It is important to note the "Search for" line. Here you select the entity you want to search for (contacts, jobs, events, companies, etc.).
Then you can create the logic of your query below. In the example here, a query that searches for all contacts with the status Active, the configuration and the creation date in the last year.
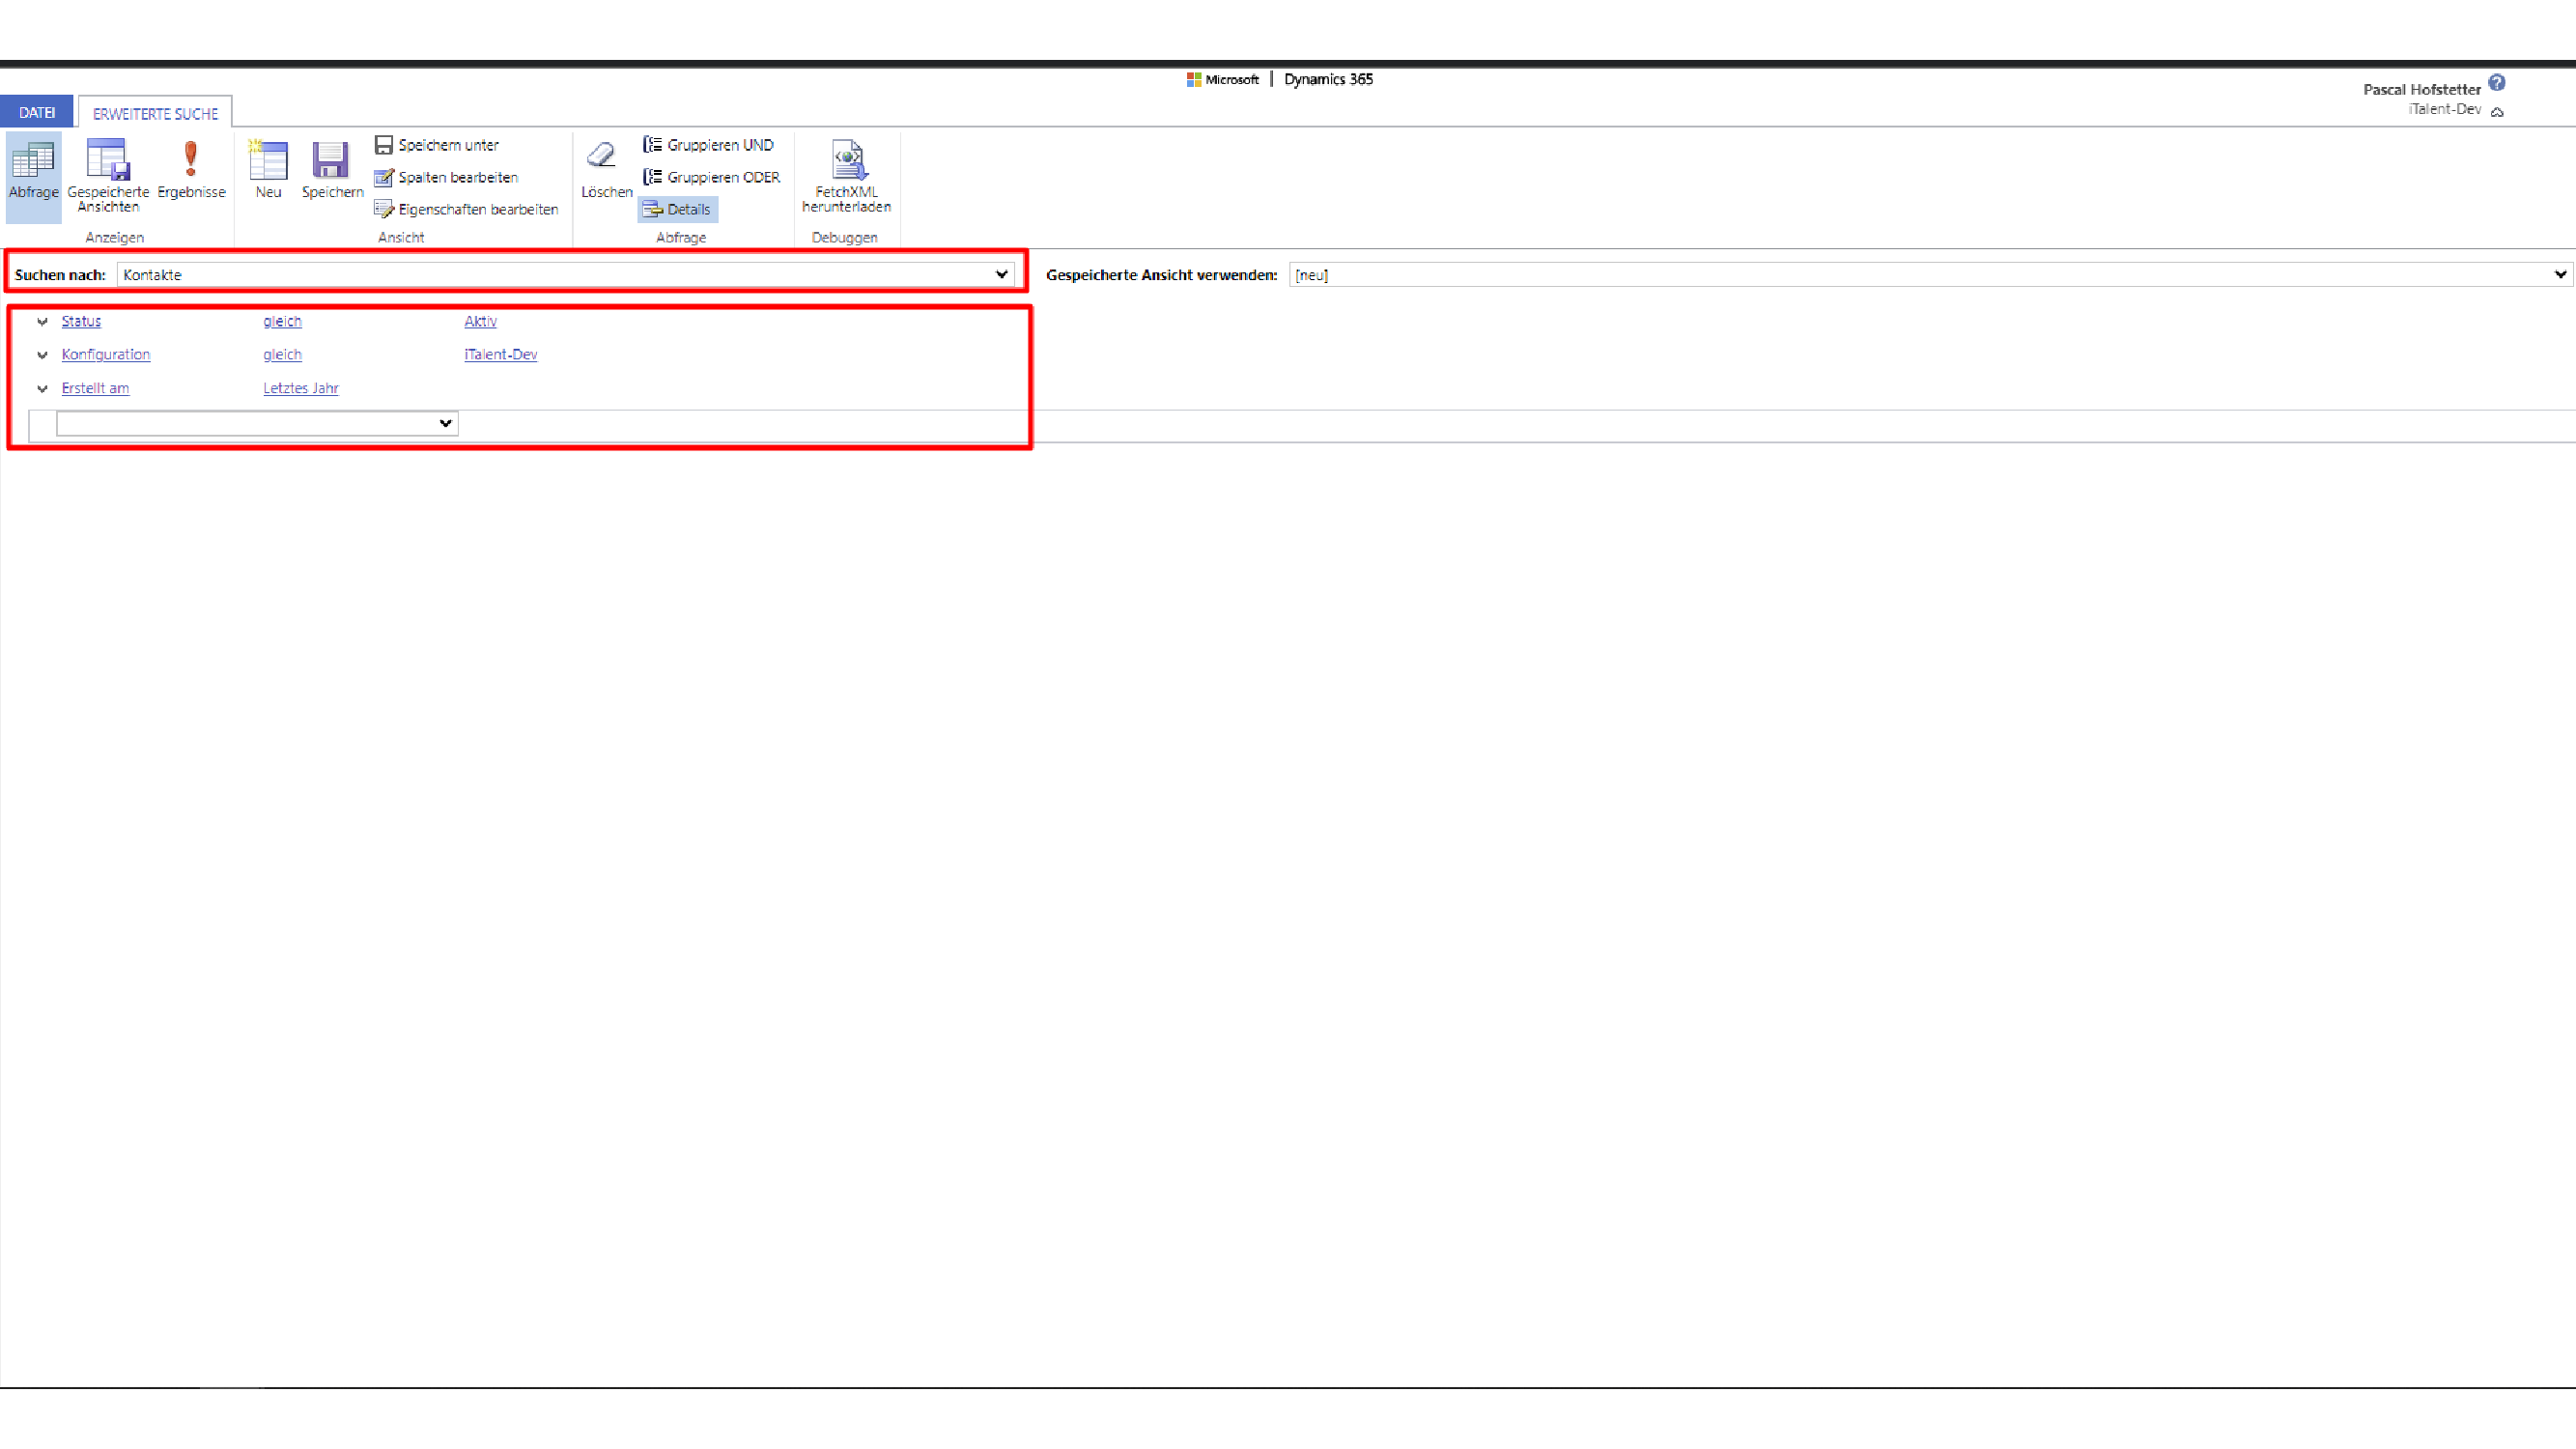
With the option "Results" you can check what data your search query provides or whether it works at all.

From here you can also export the received data directly into Excel.

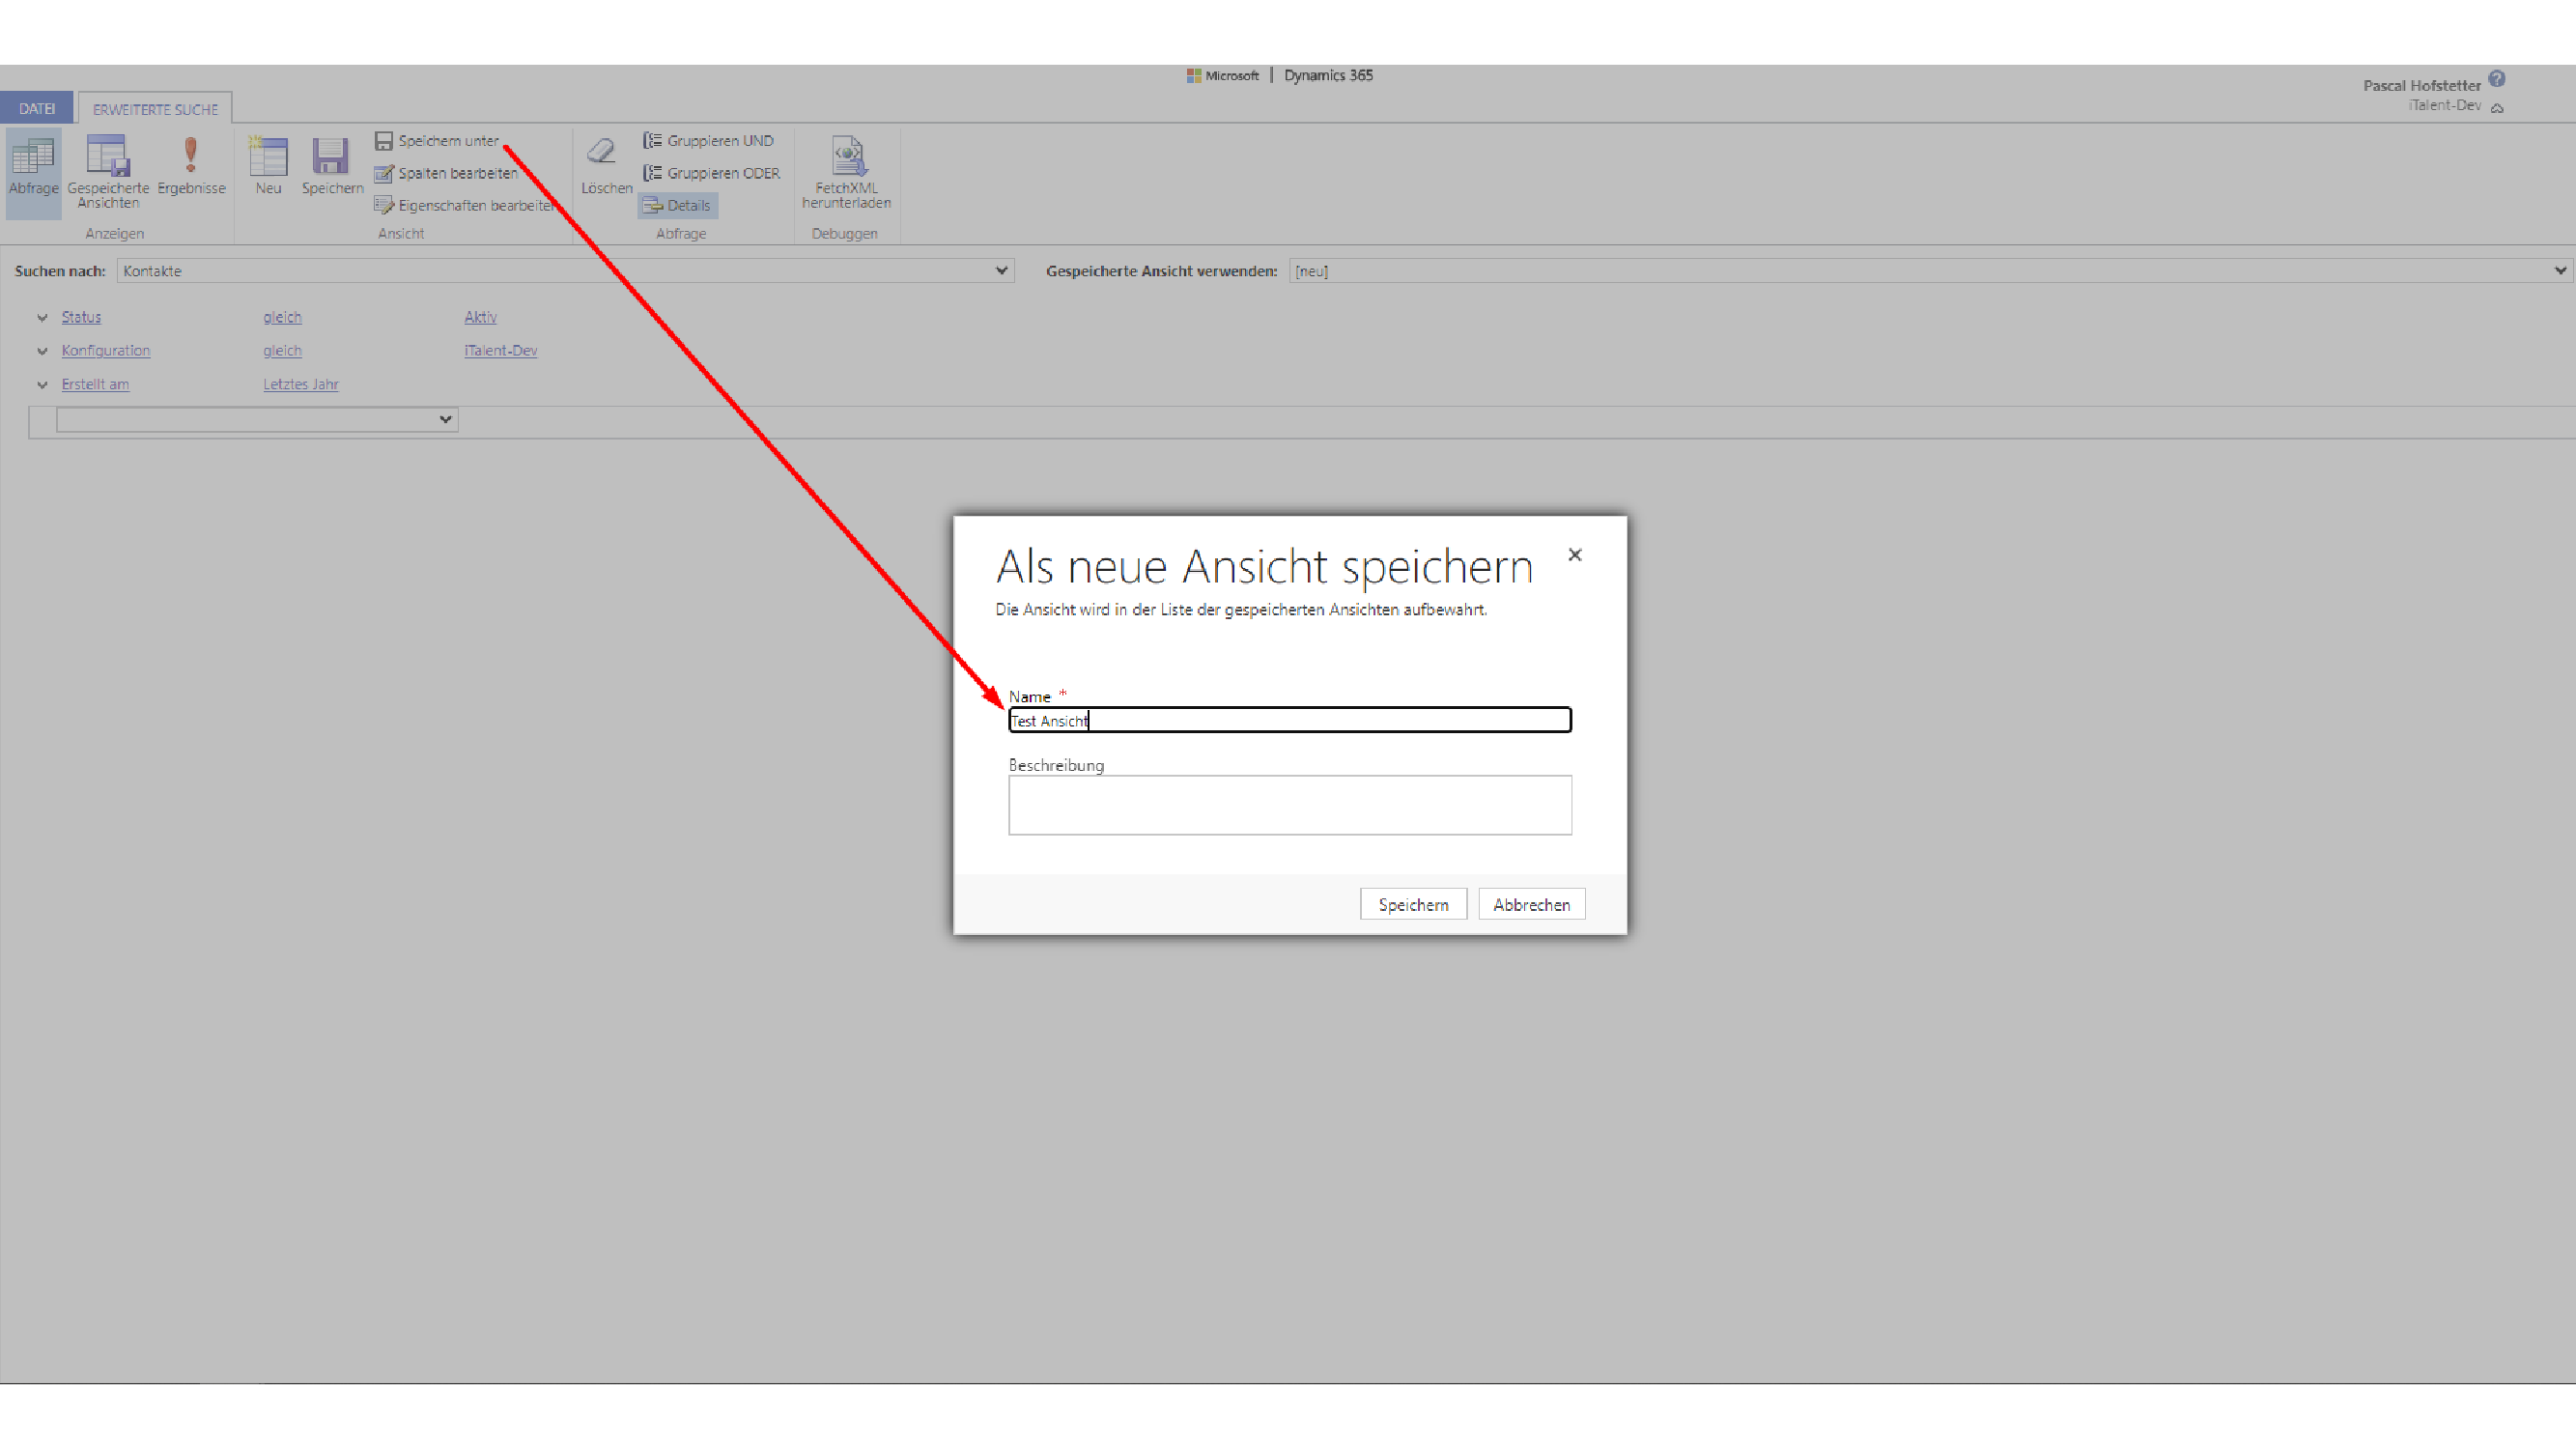
Back in the query, you can of course also save it. To do this, click on "Save as" and give the created query a name.
To the left of the "Results" option, you also have the option of viewing all your views by clicking on "Saved Views".
If necessary, you can also make these available to your team so that they do not have to build the query again.
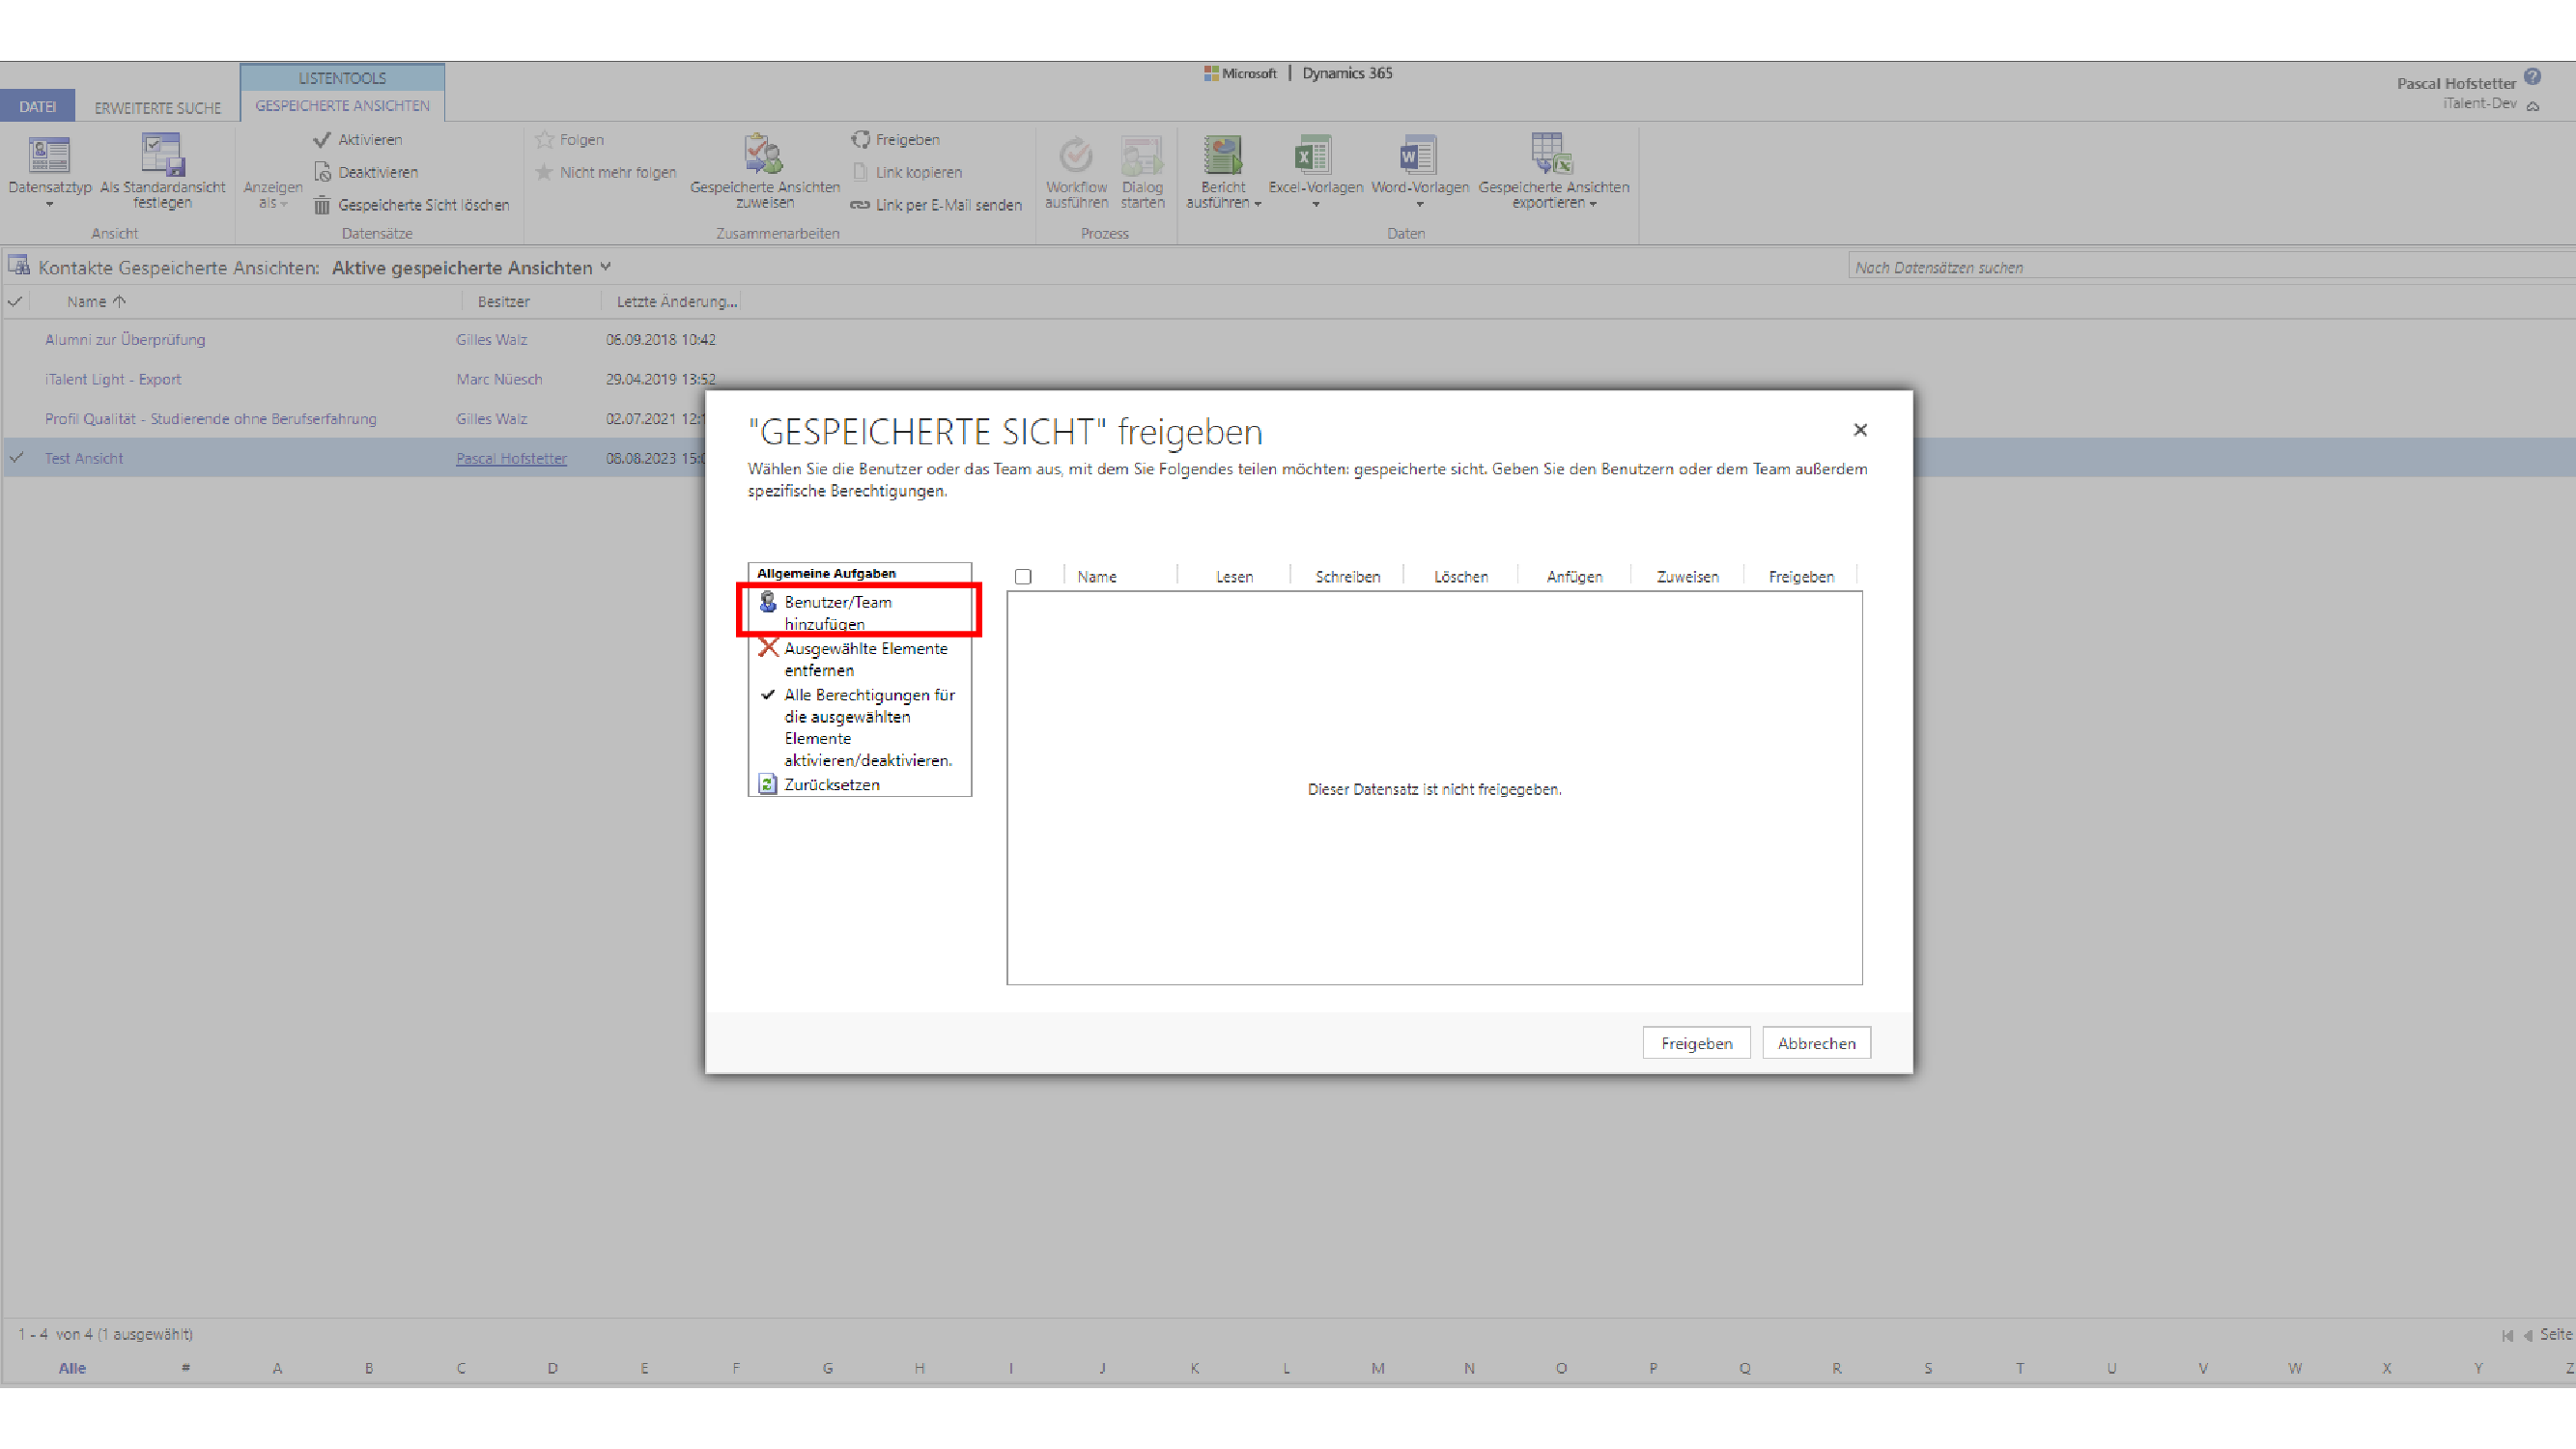
To do this, select the desired view and then click on "Share".
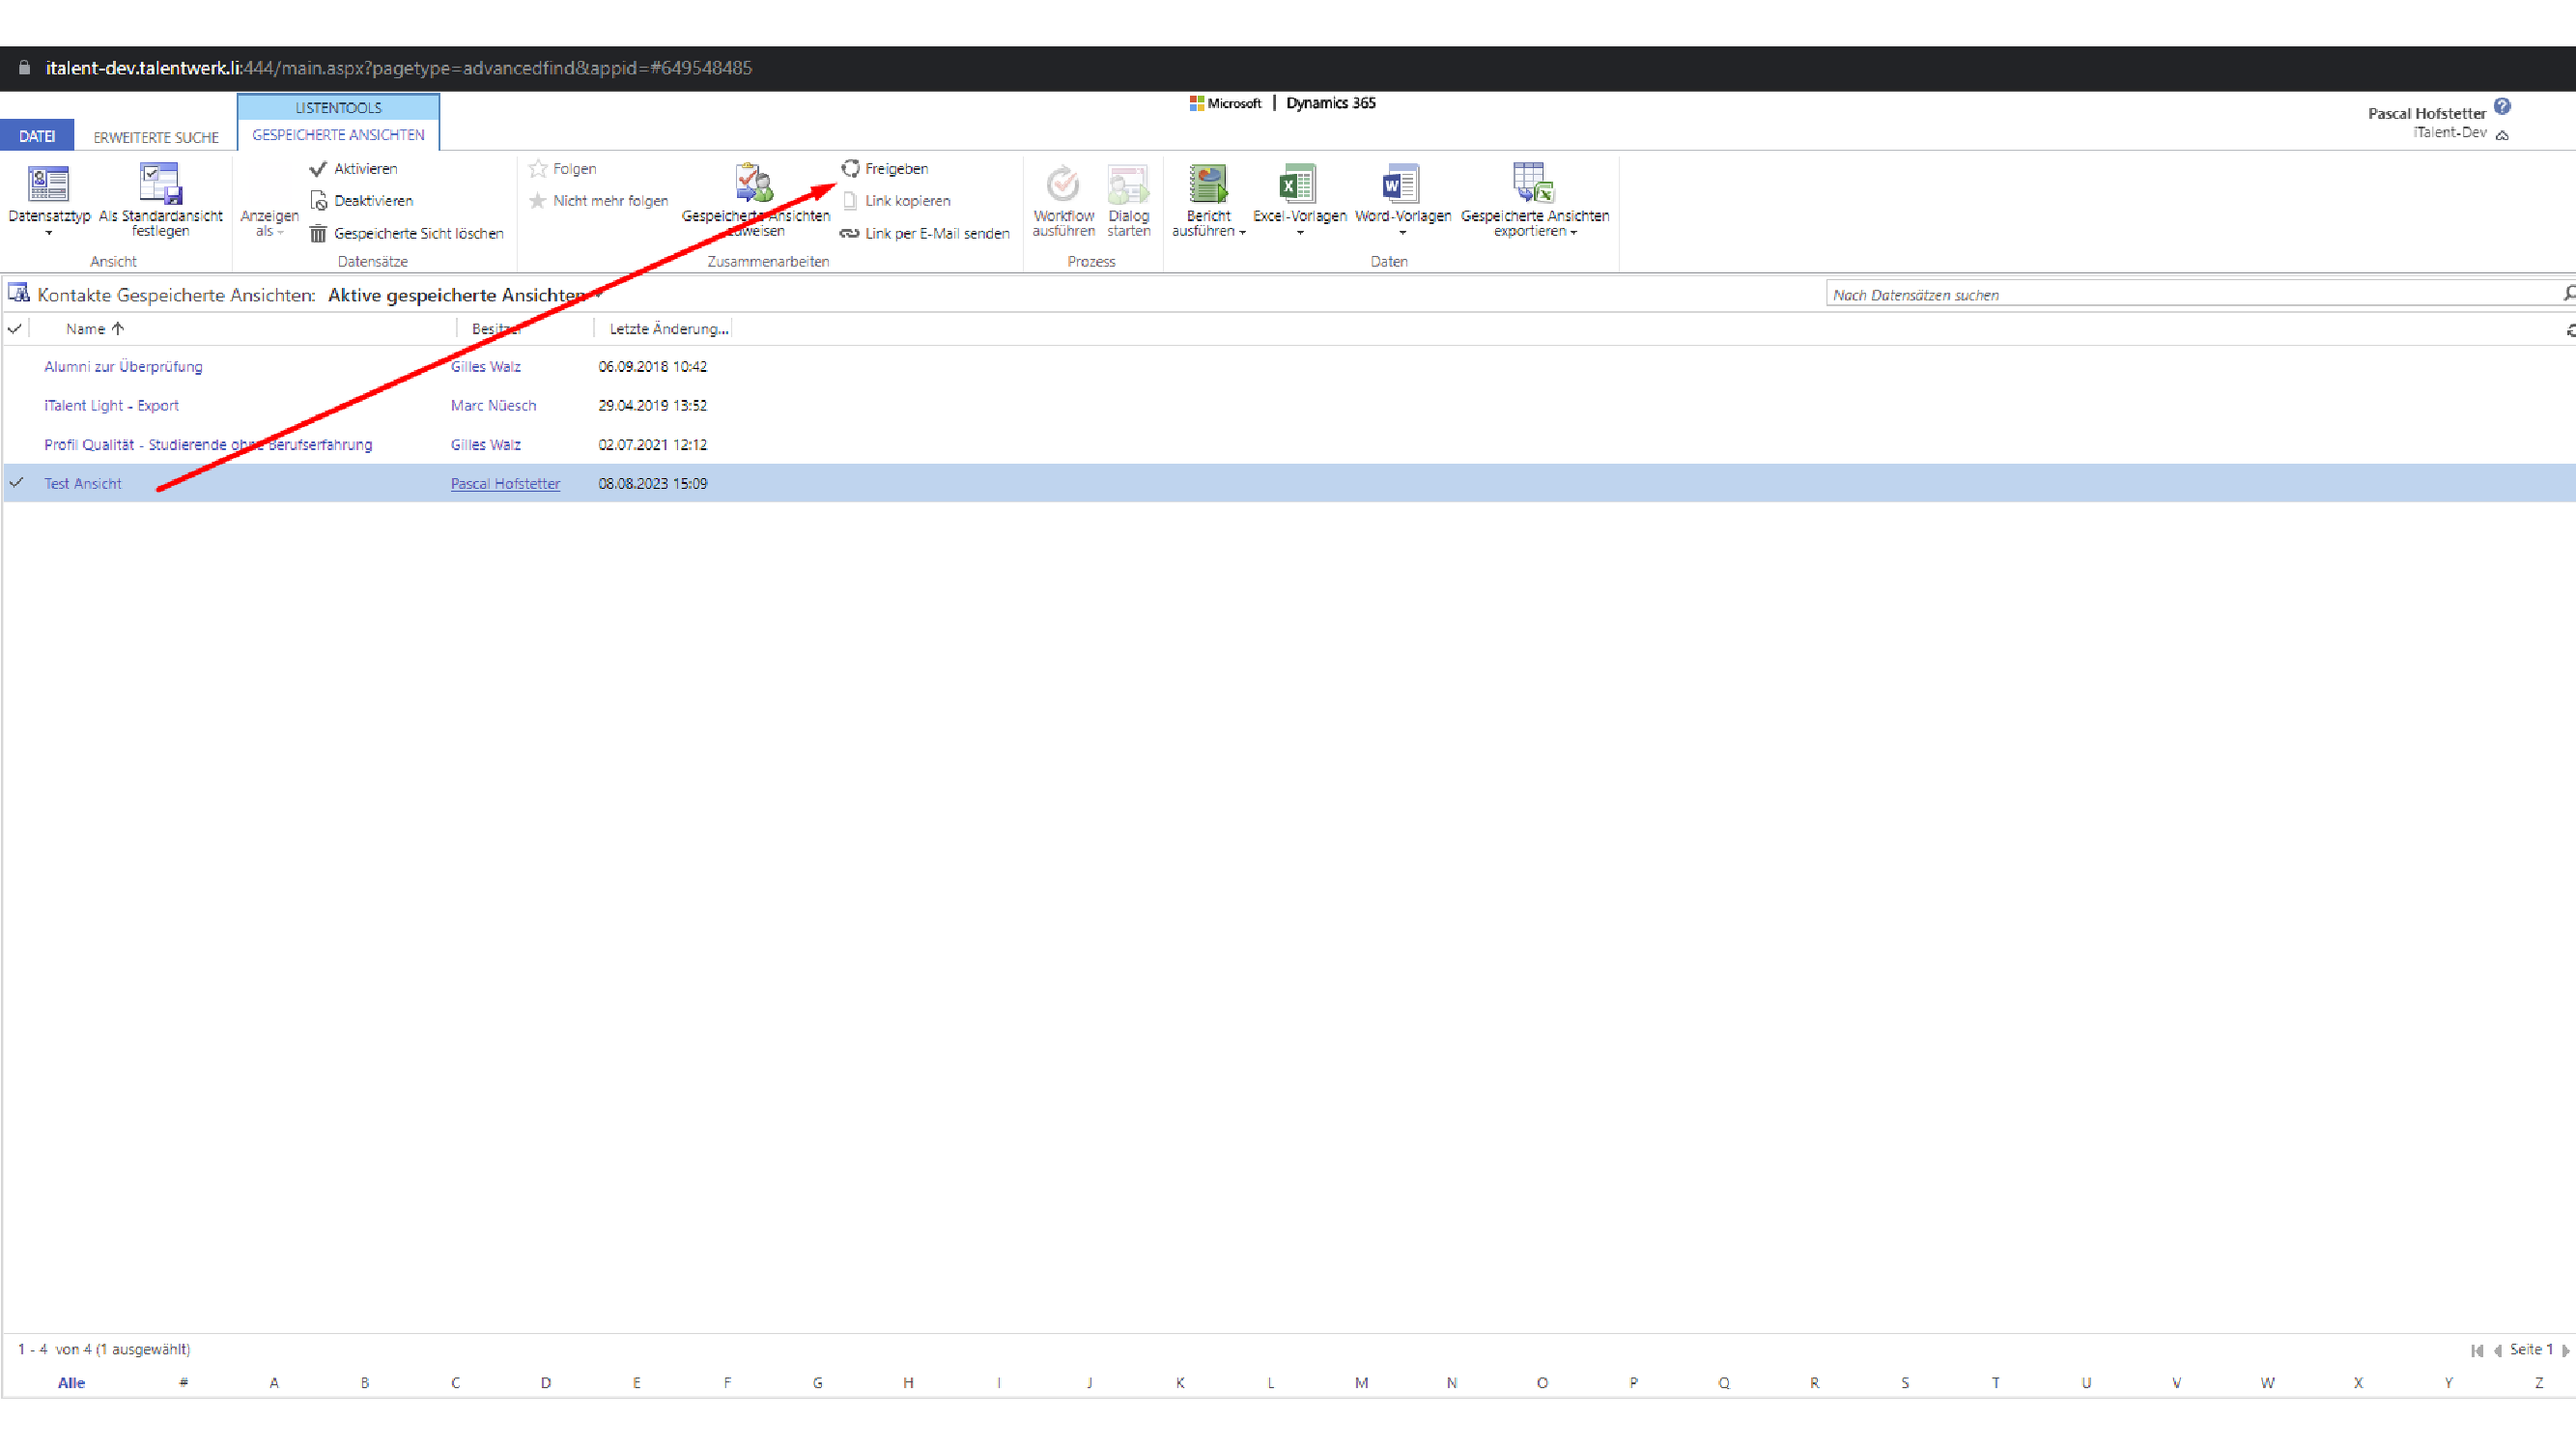
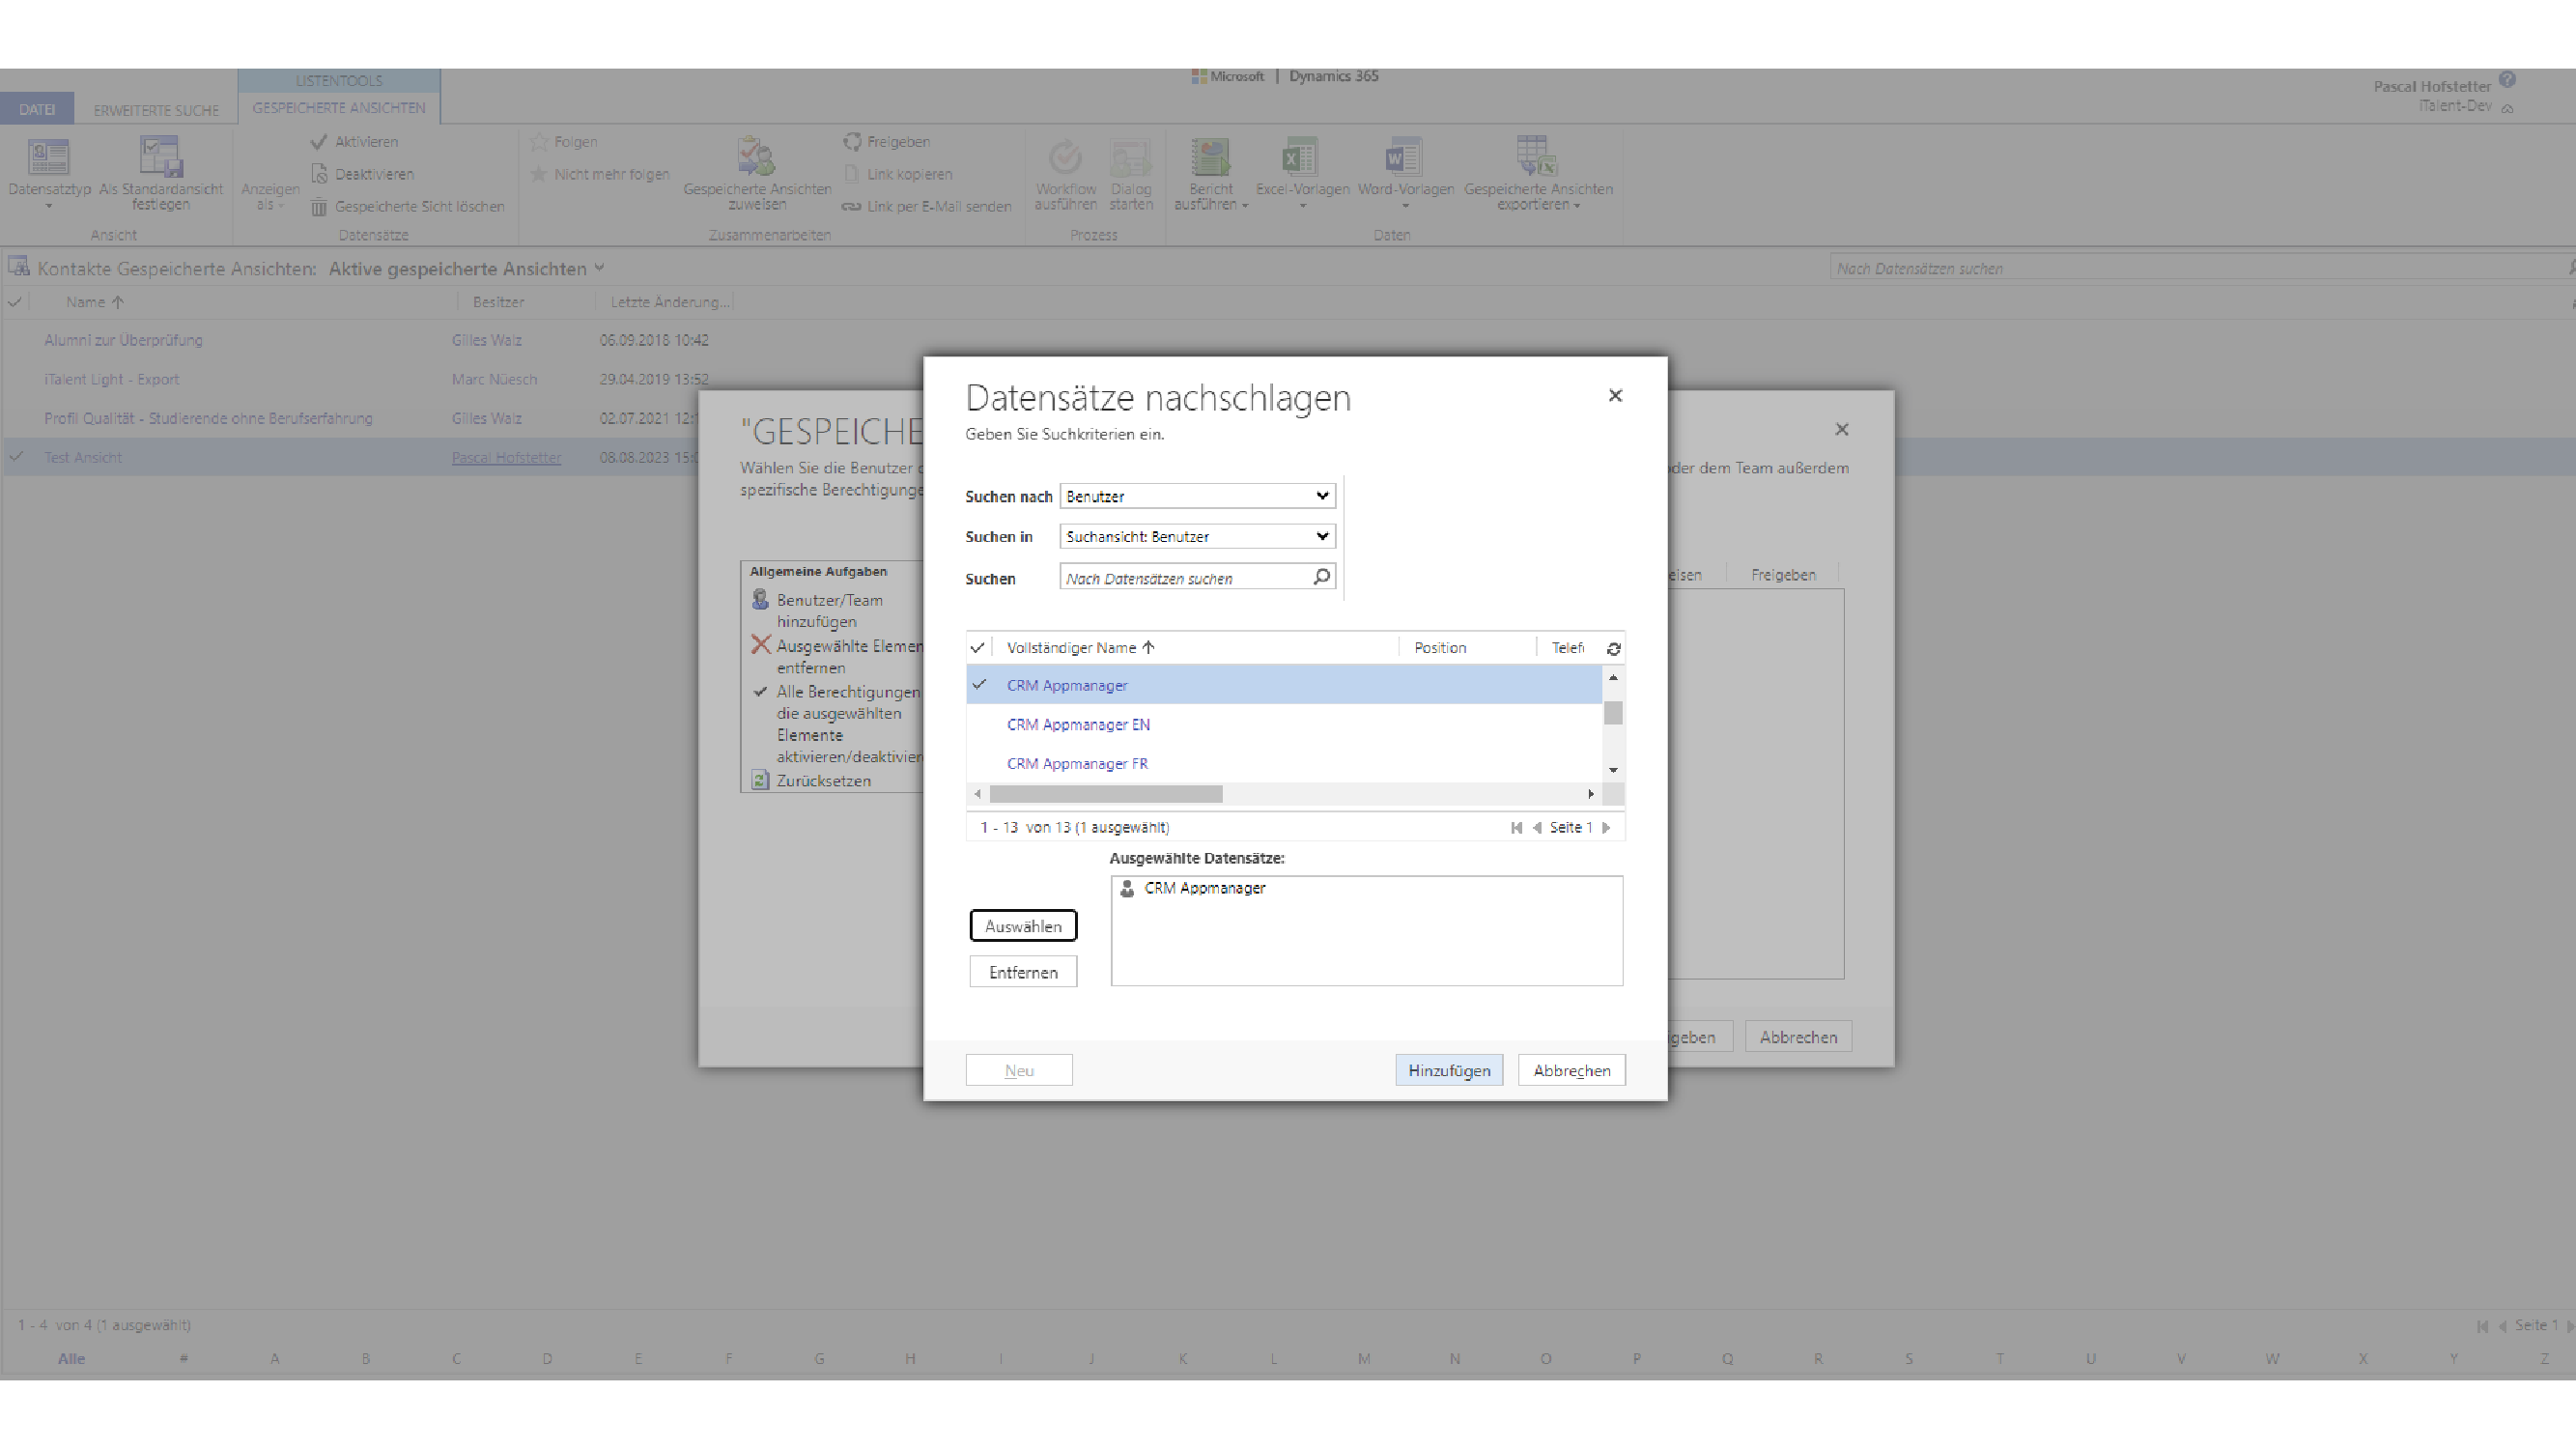
Now add all the people who are to receive the view.
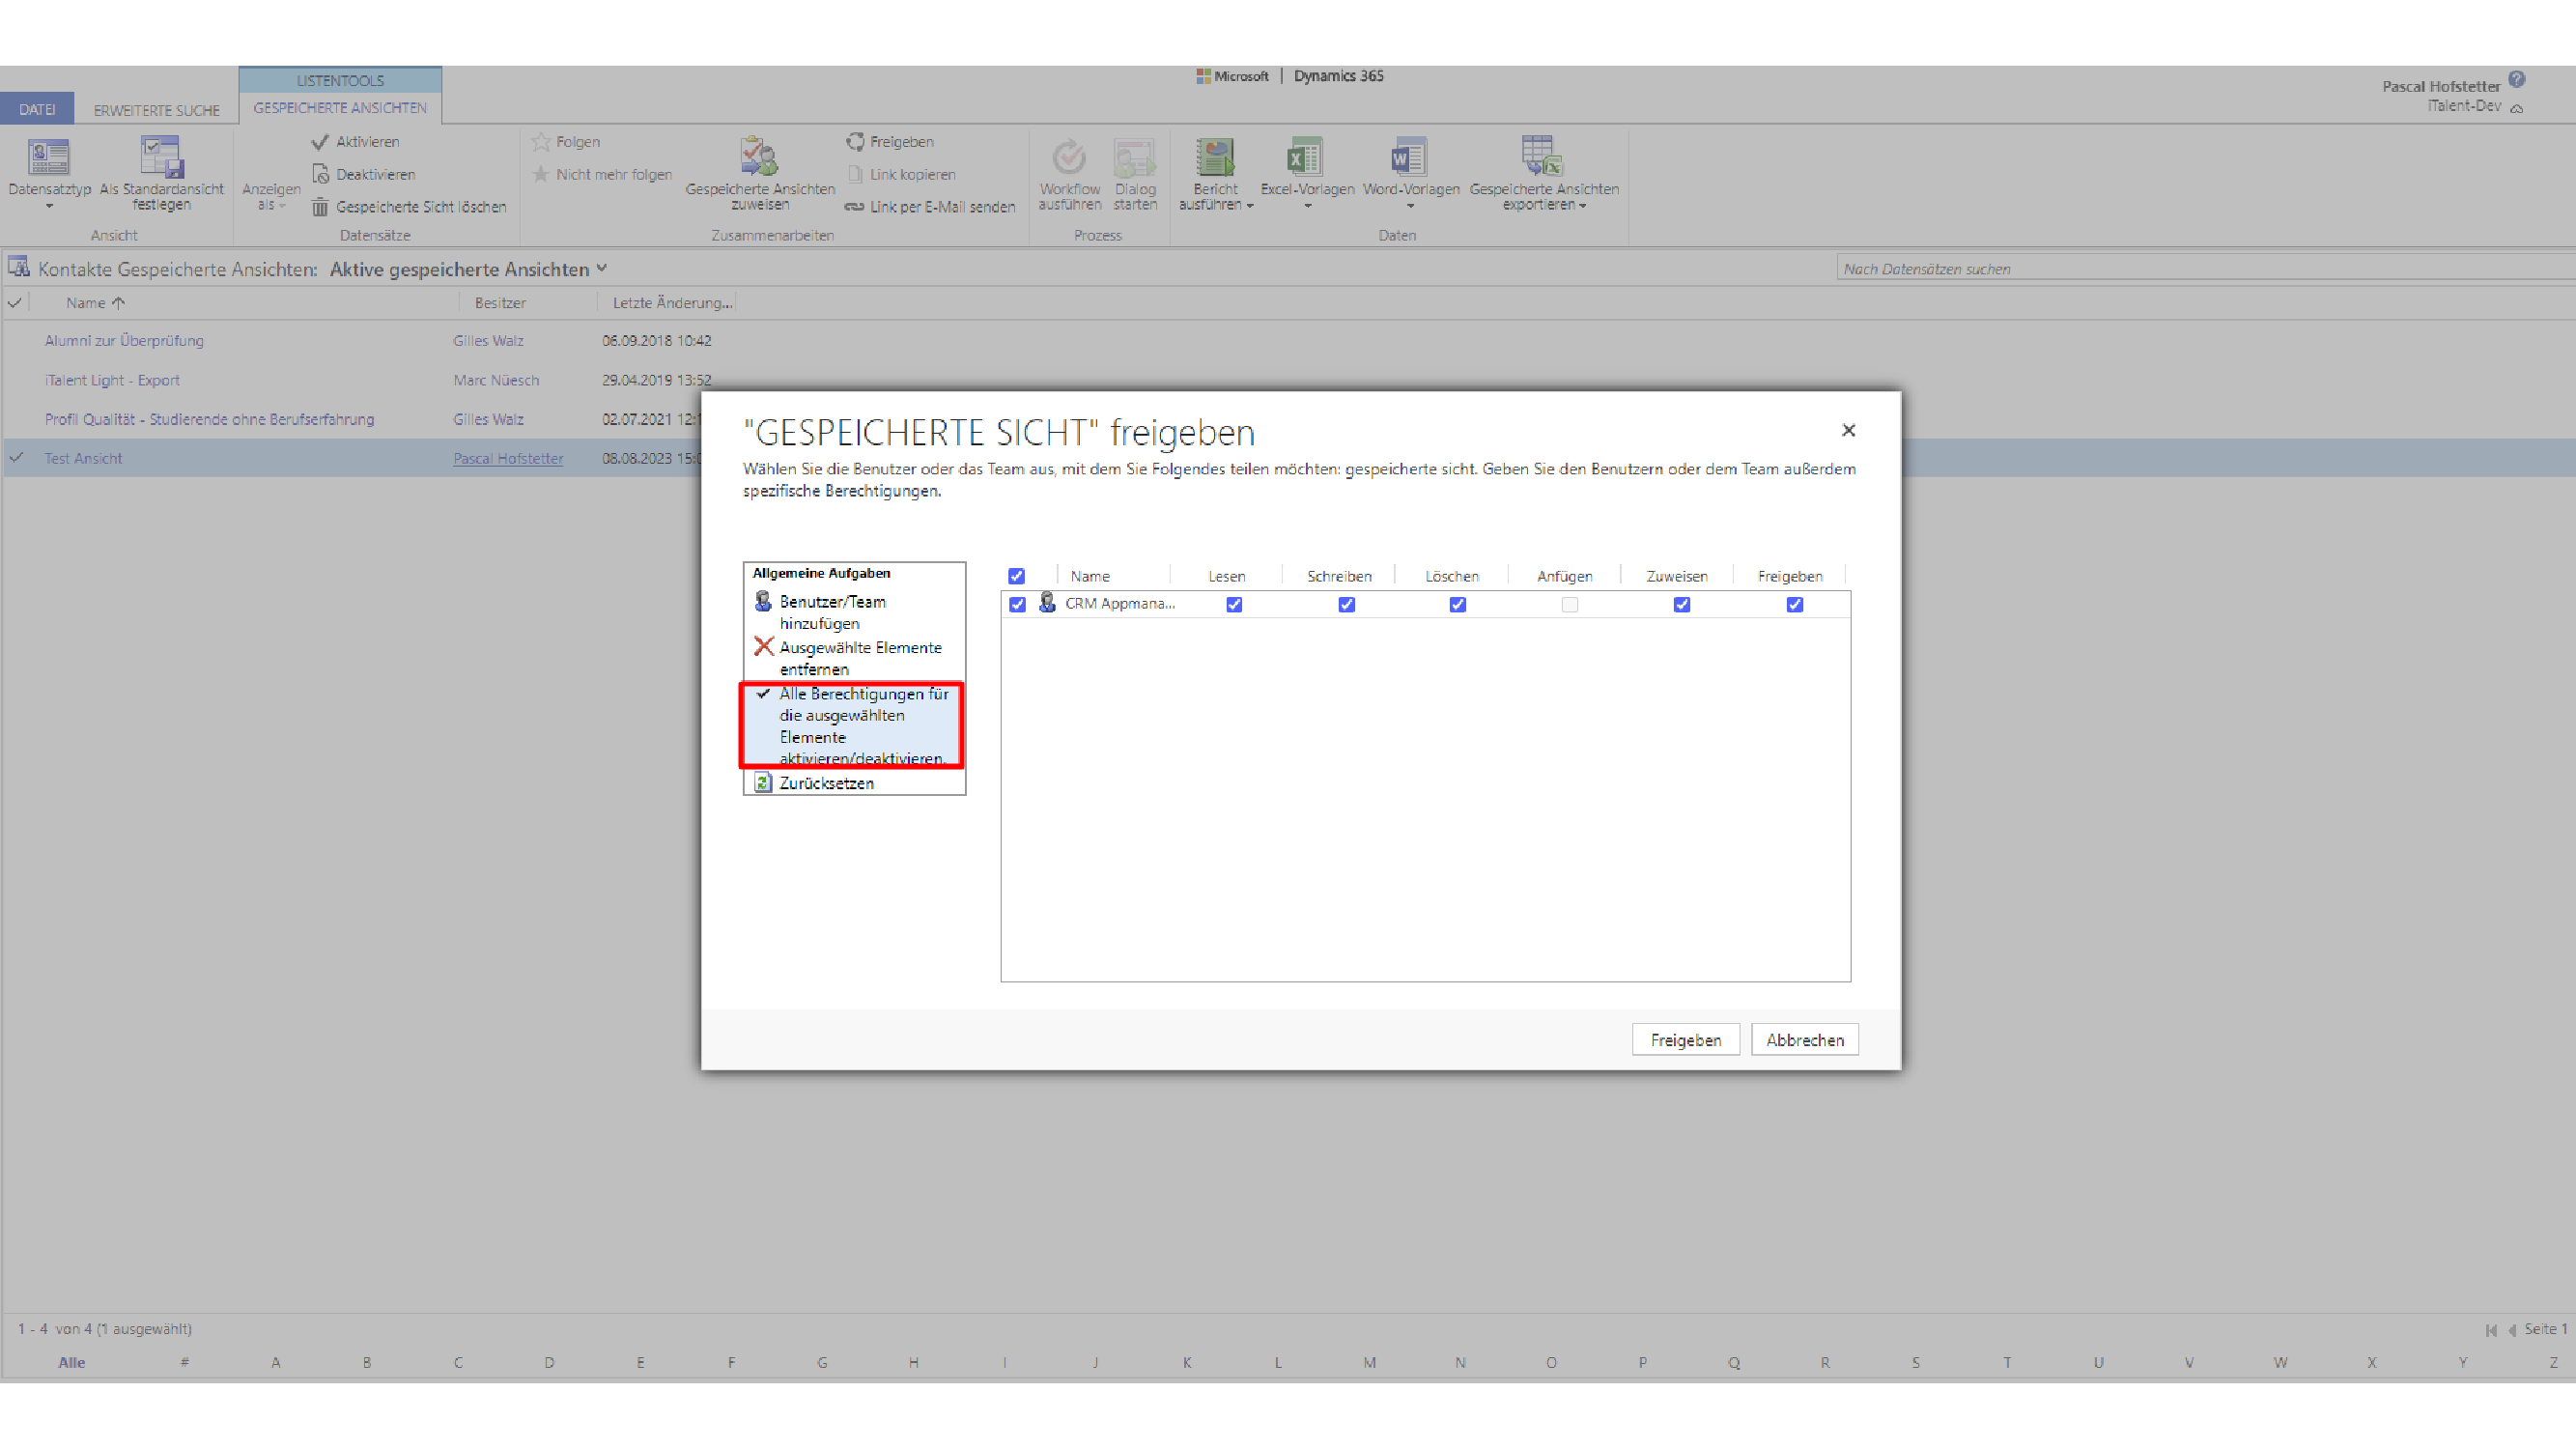
Next, decide what people can do with this view (read only or also edit).
You can now use this view in various situations, for example, if you want to create a dashboard or assign an app role to several contacts.
However, always make sure that the view is only based on one entity (here contacts) and can therefore only be used for this entity.
Weitere Artikel
Manage community settings and authorizations
In this guide, we will show you how to manage the settings and authorizations of communities.
Read moreCheck and release Job
In this instruction, we will show you how to check and release an job.
Read moreShow linked records of a contact
Here we show you how to display linked records of a contact.
Read more Deutsch