Jobs

Manage all jobs

Here we show the administrators and the companies how they can manage their jobs.


1. You are a Administrator

Here you can see how to get to the area where you can Manage jobs as an admin.

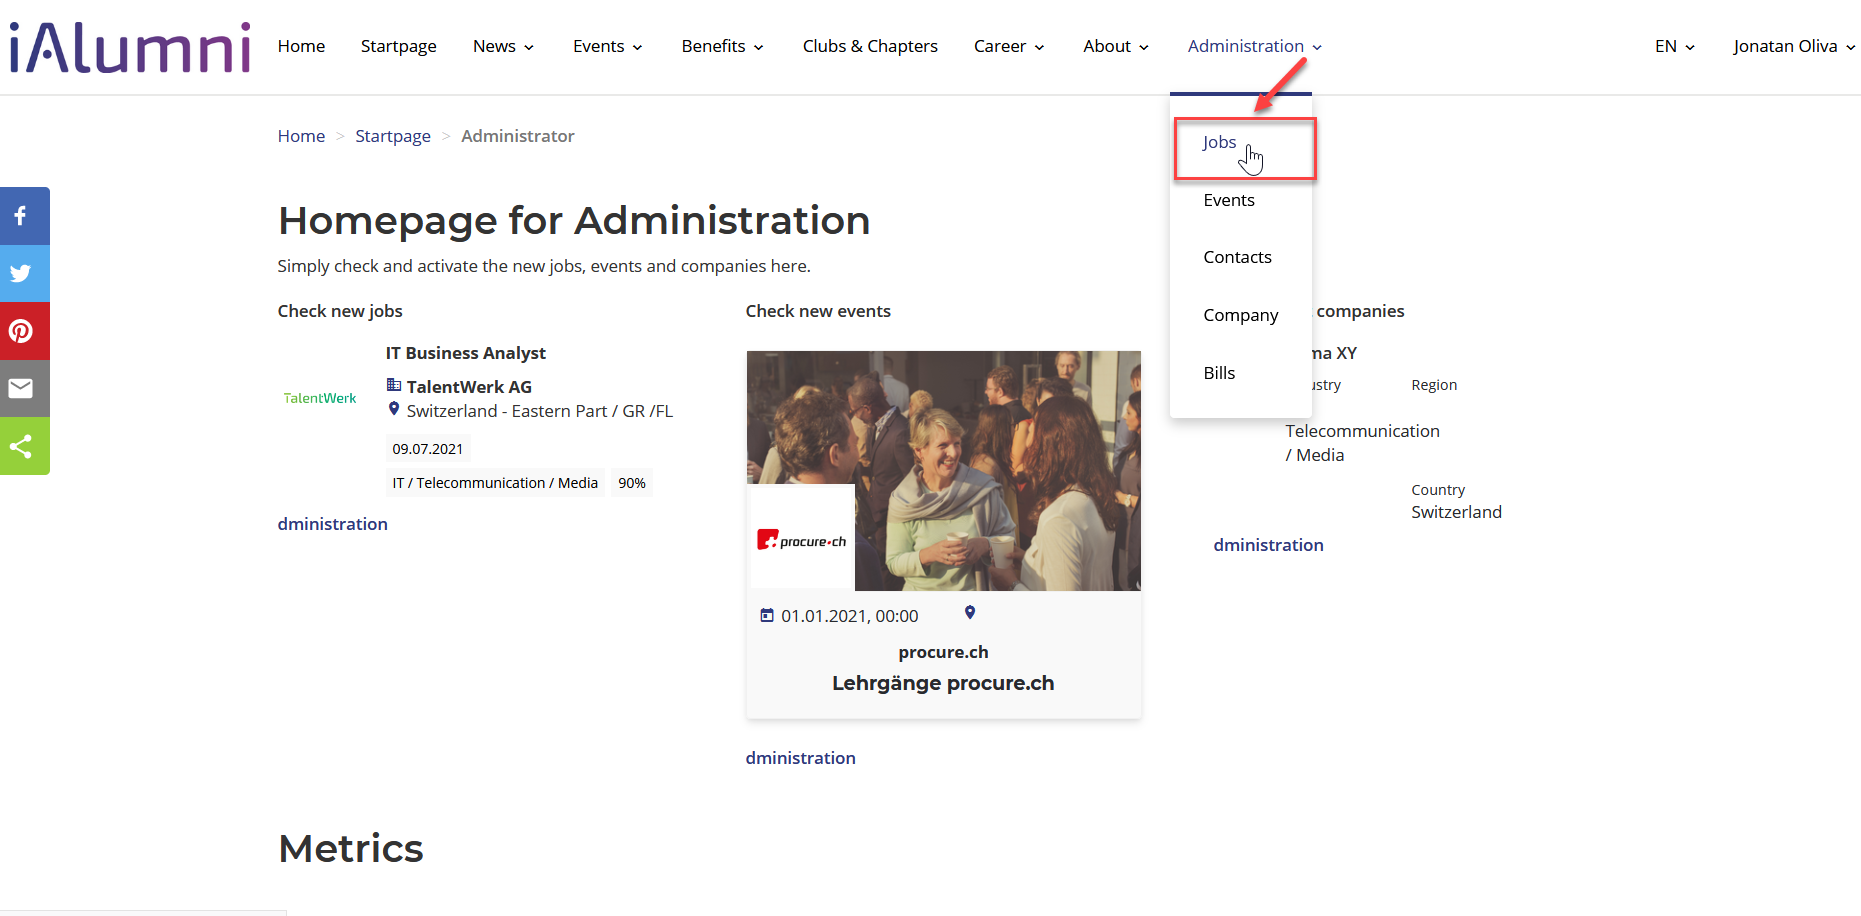
1. Go to the "jobs" section

2.1 Manage the jobs (online and in check required)

  1. Here you can filter by status. Those that are in approval still need to be checked and released.
  2. Here you can see that this job advertisement still has to be checked and activated.
  3. If you click on the "open" button, you can see the advertisement as it would appear. If you wish, you can still make adjustments in the Edit menu.
  4. If there is nothing wrong with the advertisement, you can activate it. After that, the ad will be posted.
  5. With the button "deactivate", the job ads can be switched offline.
  6. At the jobs ad which are already online, you can see the application management.
  7. Applicant management is explained here
  8. Search and invite candidates is explained here


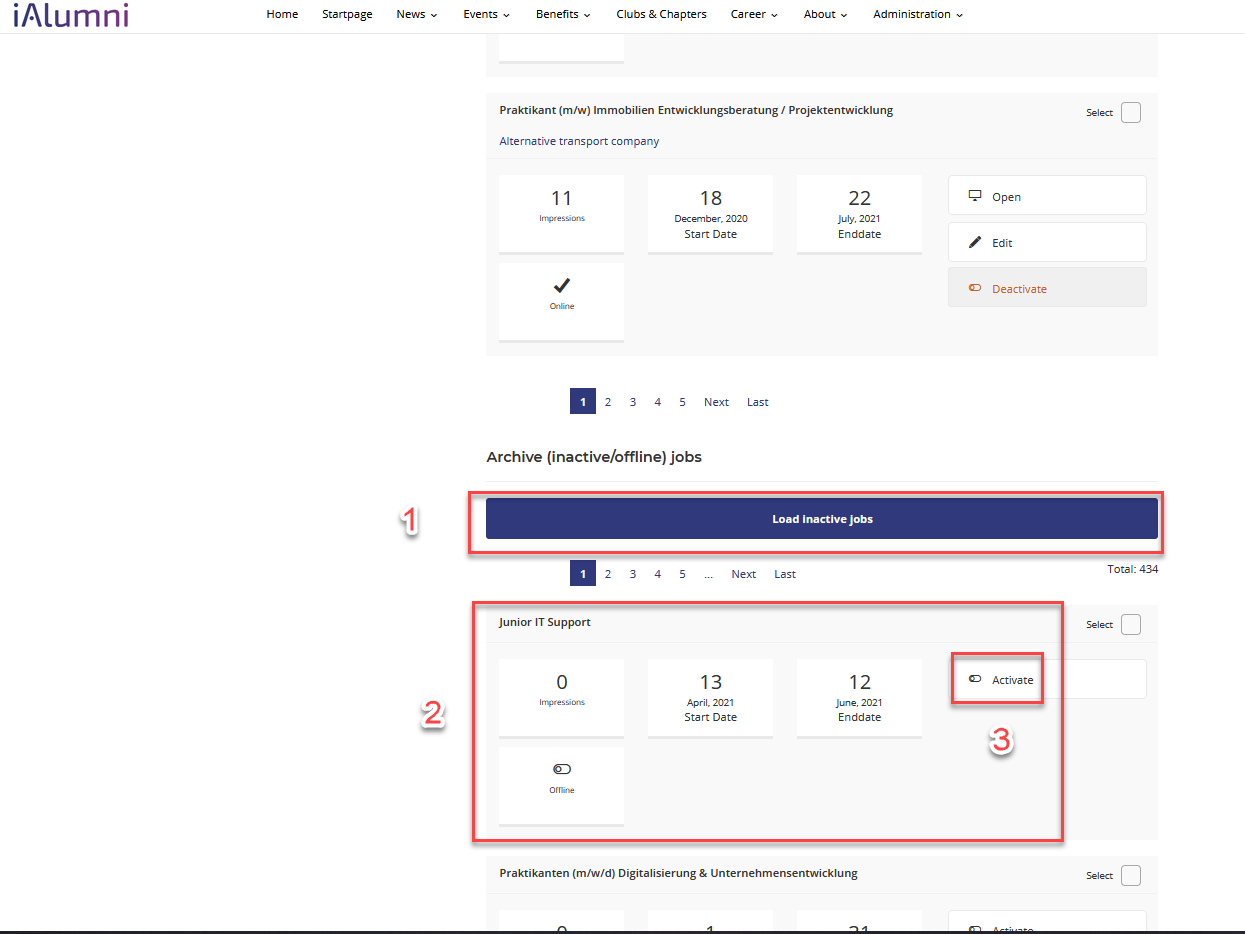
2.2 Manage inactive jobs

  1. By clicking on the Button "Load inactive jobs", the inactive jobs appear.
  2. Here you can see the worn out job "Junior It Supporter".
  3. Click here to go to the create a new job section. All information from the old job add is automatically transferred. You only have to adjust the date and, if desired, the informations. Then you can confirm the purchase.
  4. Here you will find the instructions for the "Create a new job" section.

2. You are a Company

Here we show you how to manage your jobs

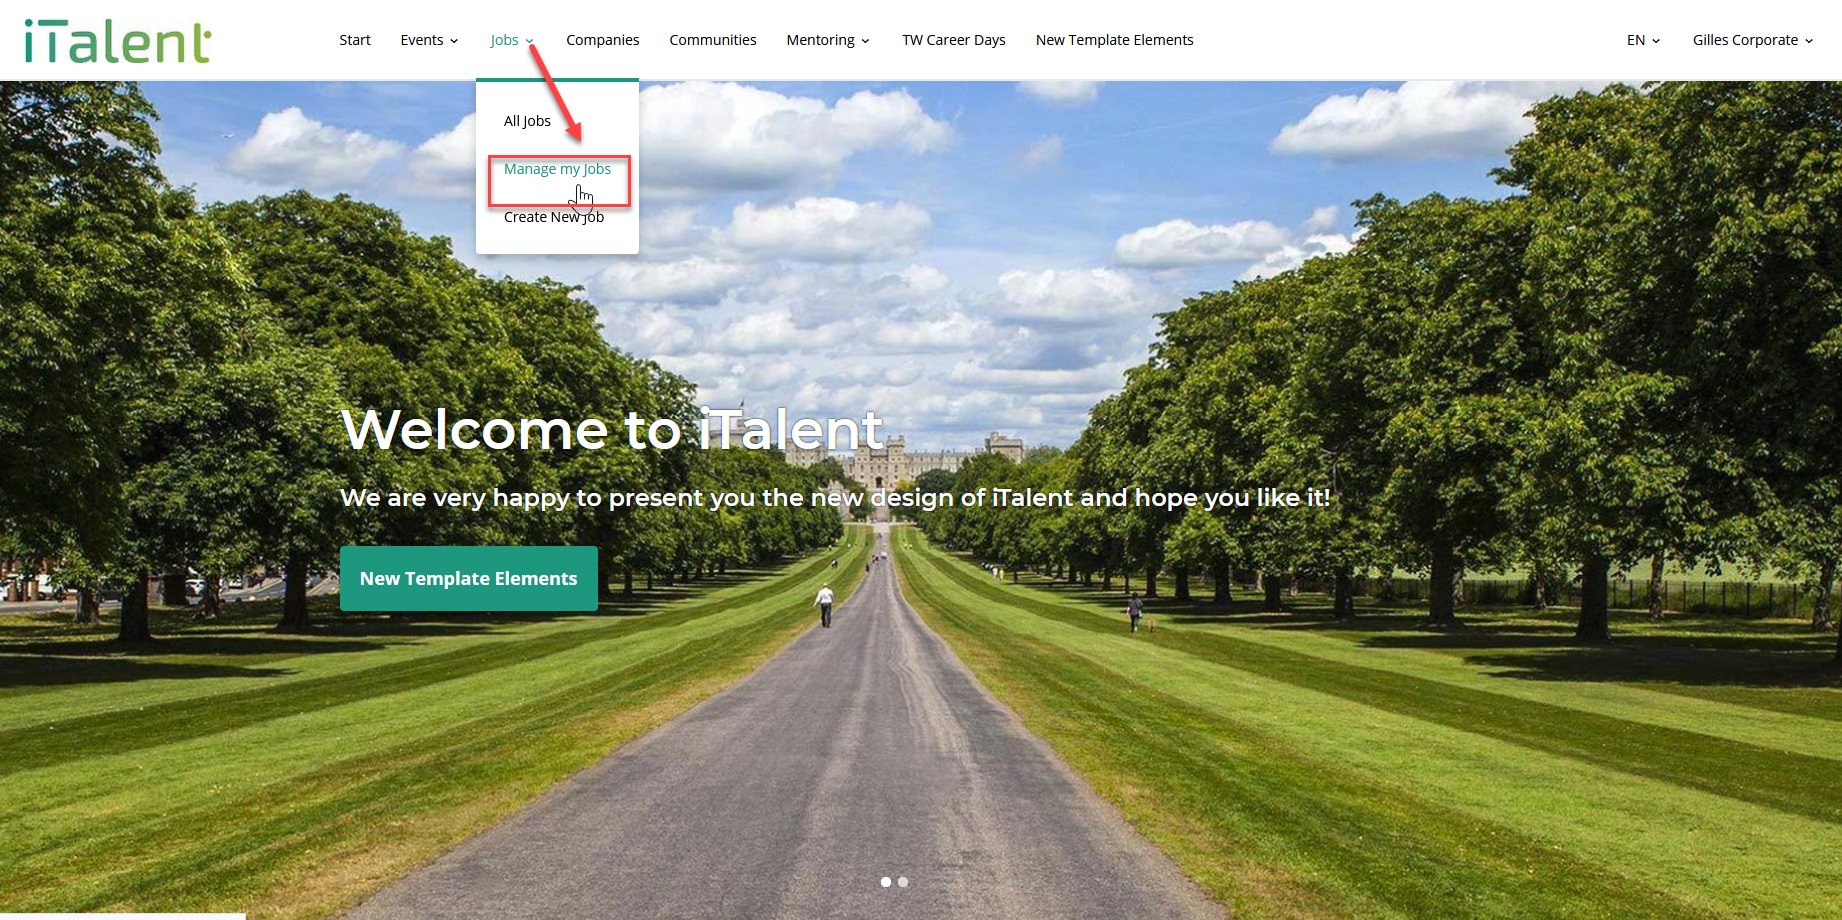
1. Go to "Manage my jobs"


2.1 Overview "Manage my jobs"

  1. If you click on the Archive tab. you will see all the inactive jobs that you have already posted. If you want to repost one of these ads, you can click on Acitvate. You can then adjust the content. A similar procedure is shown here.
  2. In this section you will find all your job advertisements that are online.
  3. Here you can see the job ad
  4. Here you can edit the content
  5. Here you can deactivate the job advertisement
  6. Applicant management is explained here
  7. Search and invite candidates is explained here


2.2 Manage applications

  1. Here the applications are sorted according to their status.
  2. Here you can view the individual applications as well as comment on them (Only visible to you and your colleagues)
  3. If you select the field, you can take further steps for this application (You can see the options in section 4).
  4. Possible steps for applications you have selected in step 3


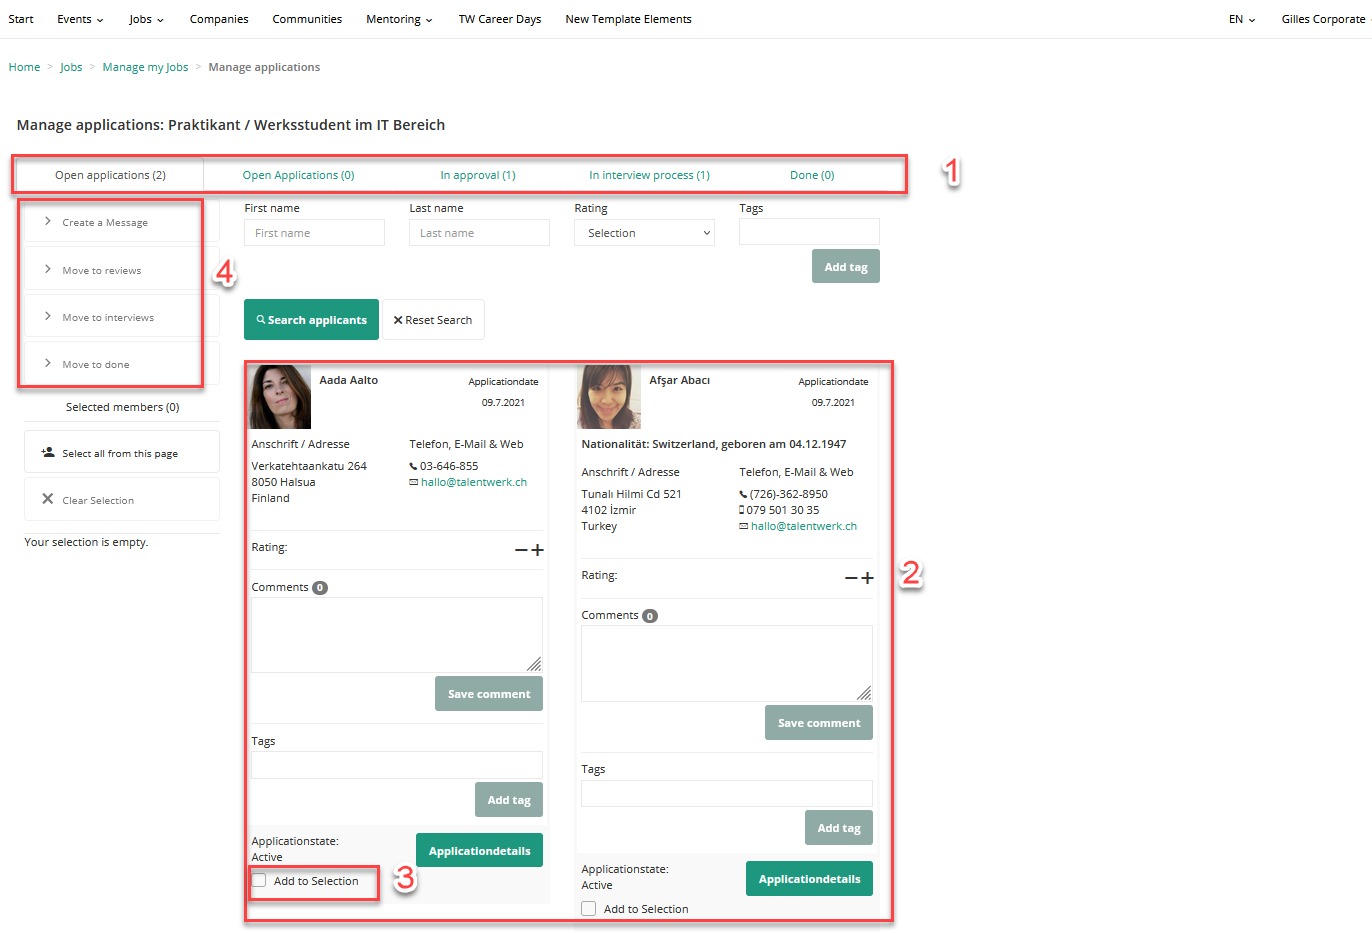
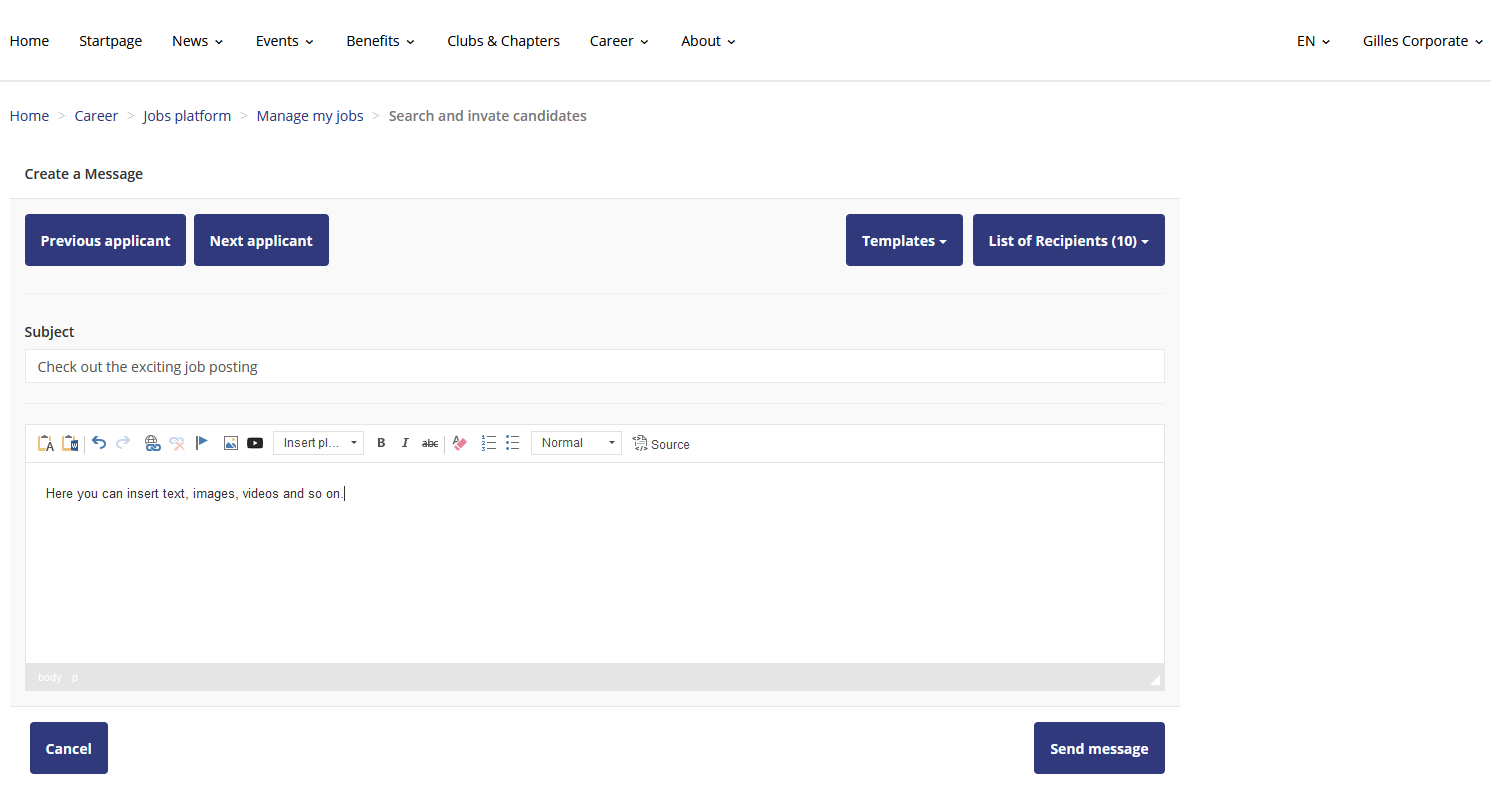
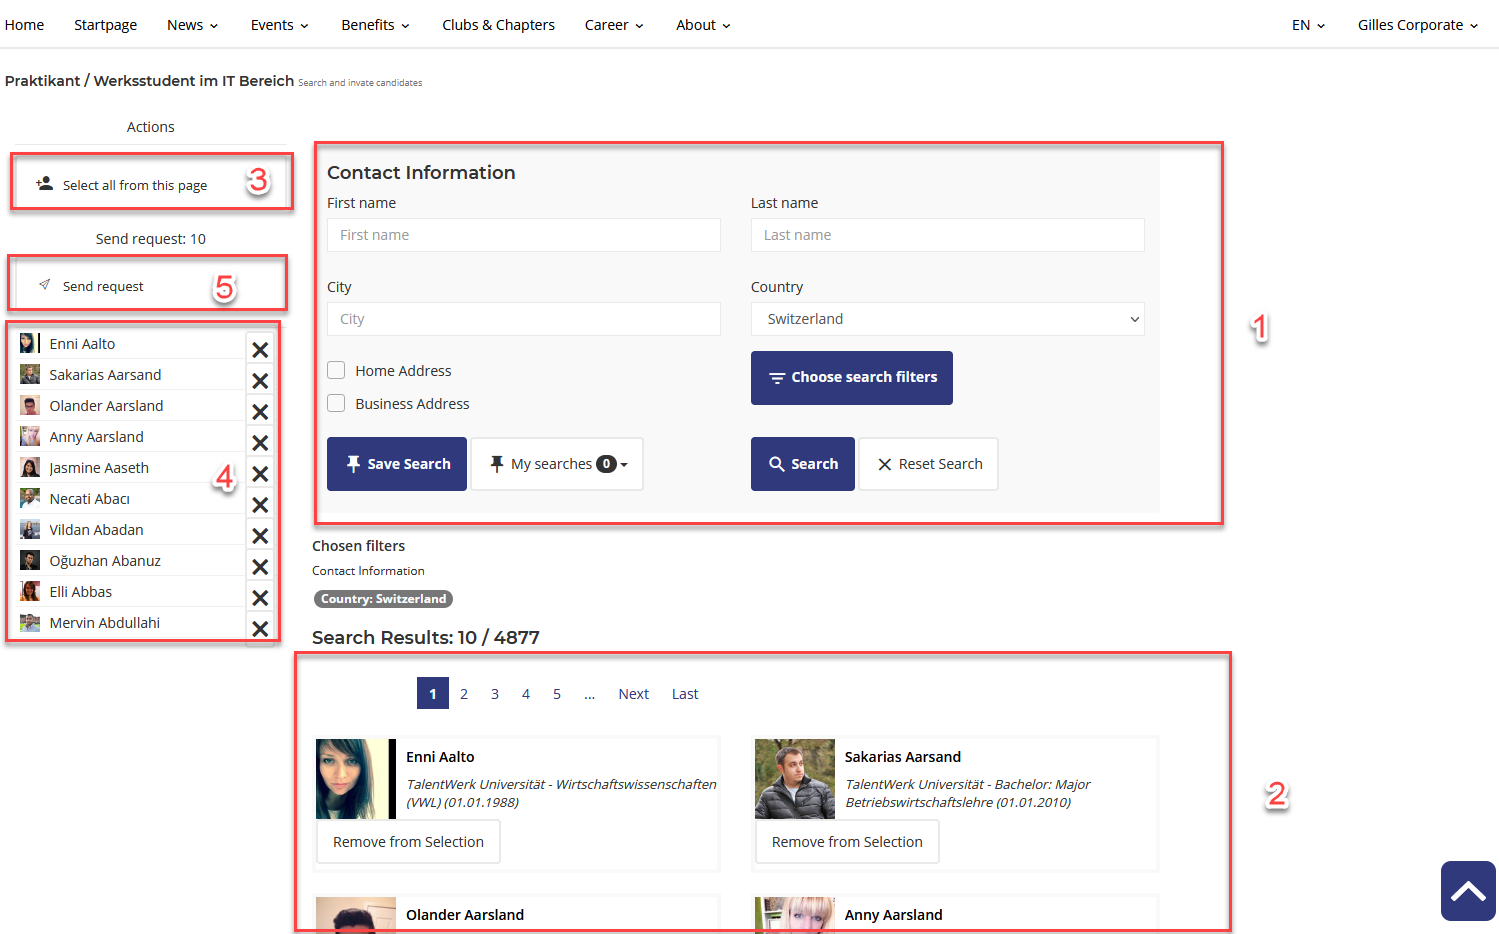
2.2 Search and Invite Candidates

Here you can prepare the message you are sending to the candidate, which you can filter below


  1. Here you can make different filter settings
  2. Here you can see the filter results. Here you can view the details of the candidates or add them to the selection.
  3. You can also include all candidates displayed on this page in the selection.
  4. Here you can see all selected candidates
  5. When you have selected all candidates and the message is ready, you can send it to the Selected Candidates. An email is triggered automatically

Weitere Artikel

News

News erstellen

In diesem Artikel geht es um das Erstellen von News mit der App-Rolle als News Author.

Mehr lesen
Kurs

Teilnehmende verwalten

In diesem Artikel erfahren Sie, wie Teilnehmende eines Kurses verwaltet werden können.

Mehr lesen
Kurs

Kurs online schalten

In diesem Artikel erfahren Sie, wie Sie einen Kurs online schalten, nachdem er erstellt wurde.

Mehr lesen