Deutsch
Create Categories for Content
In this article you will learn how to create categories for Content.
To create categories for content, click Content (Types) under Settings.
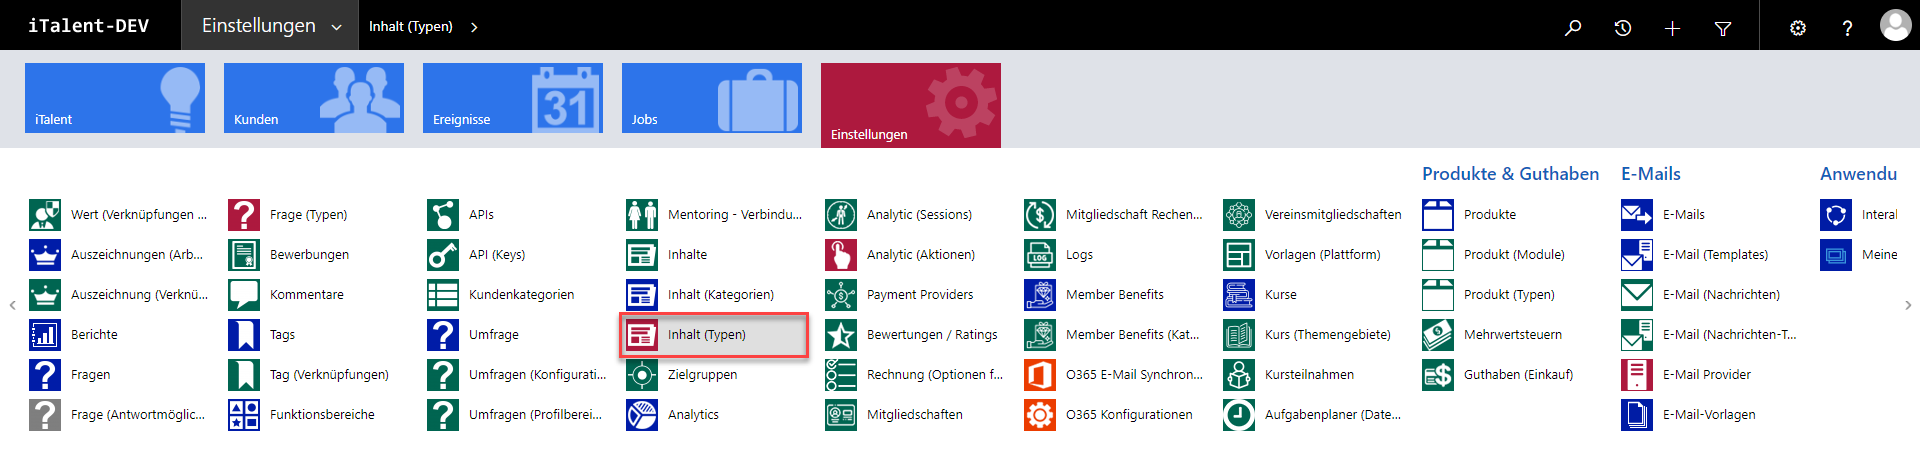
Click on "+ New" to create a new category.

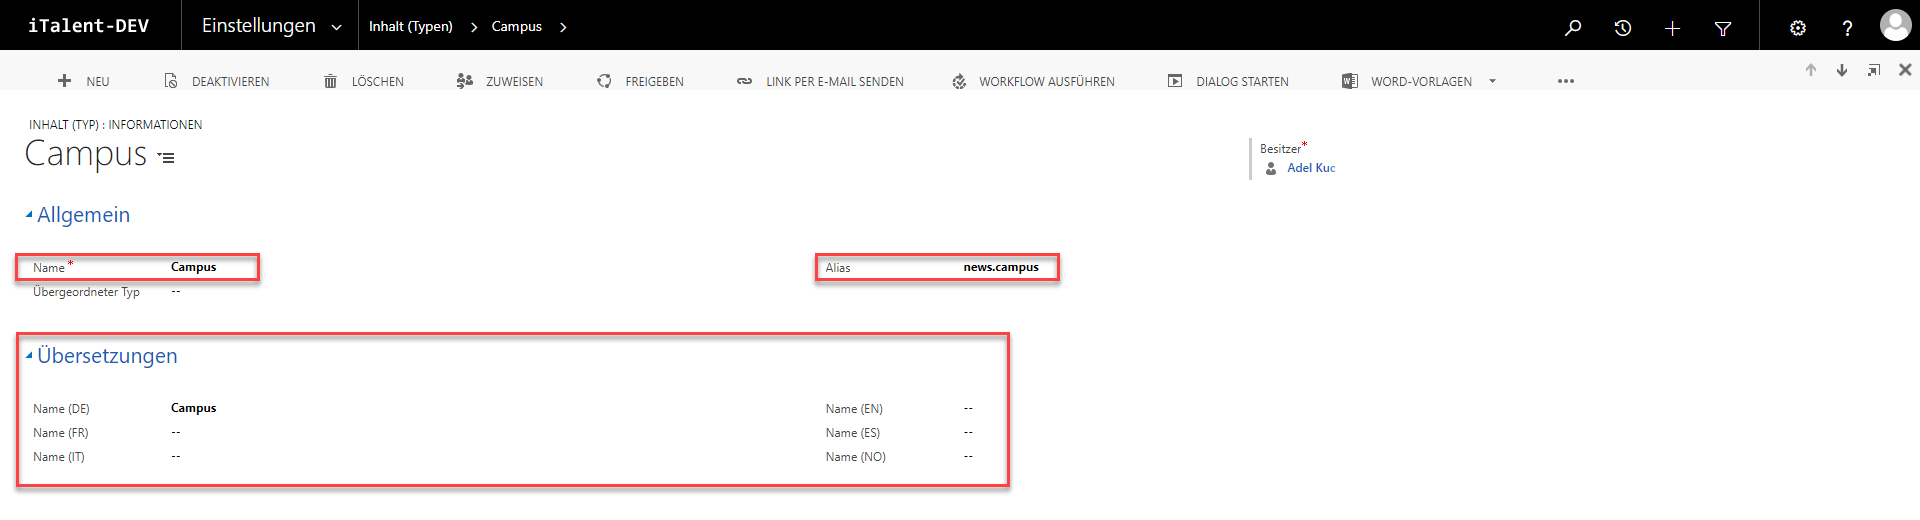
Enter the name of the category and fill in the necessary translations. For the alias, put "news." as shown in the example below.
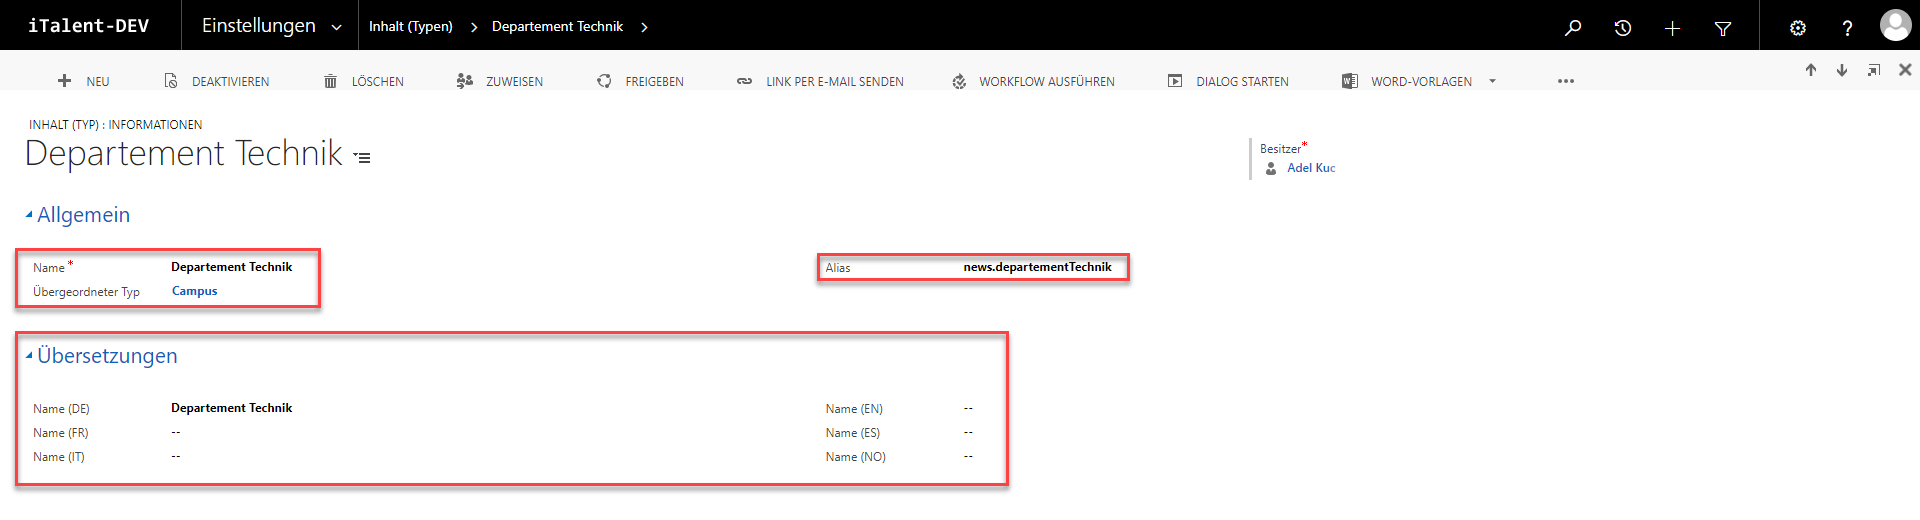
In the example below, a superior type is also set. The superior type must already be created so that it can be set. Here, the category that was created in the example above is used as the superior type.
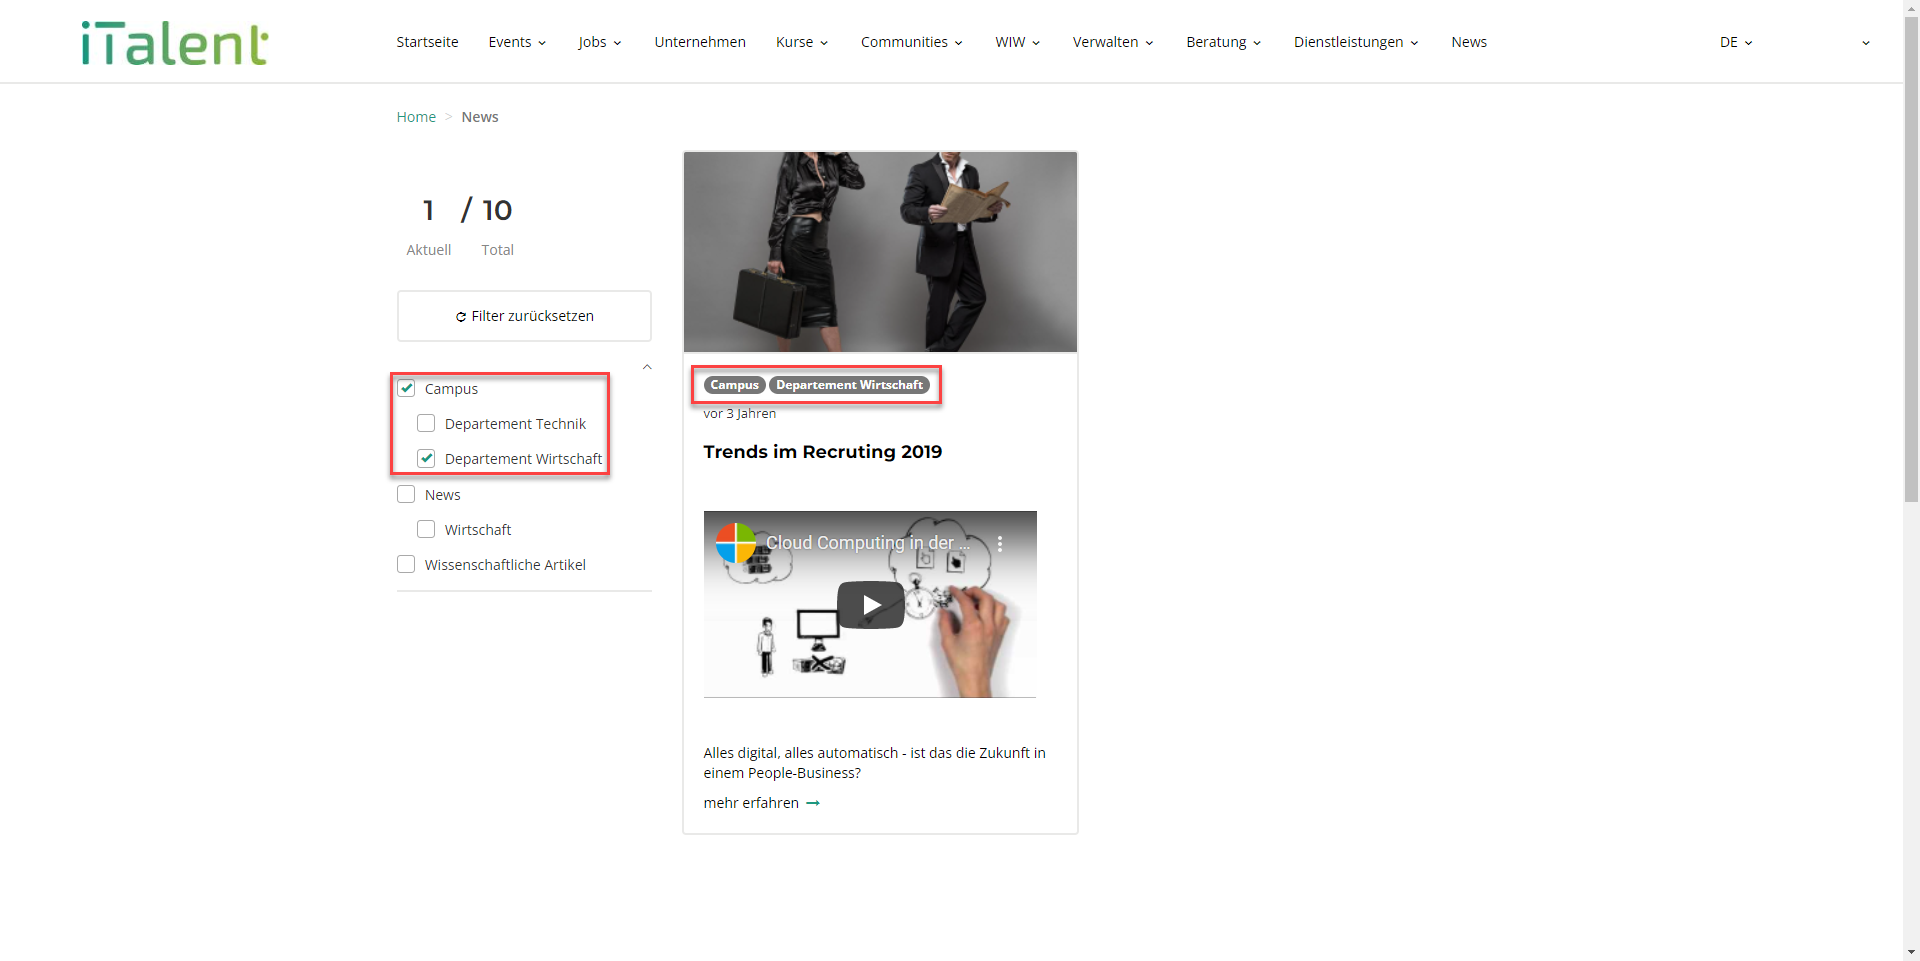
In order for the categories to be visible and functional in the frontend, they must be activated in the Umbraco CMS.
1. Navigate to the "News" page.
2. Click on "Content (from CRM)".
3. Select your newly created categories.
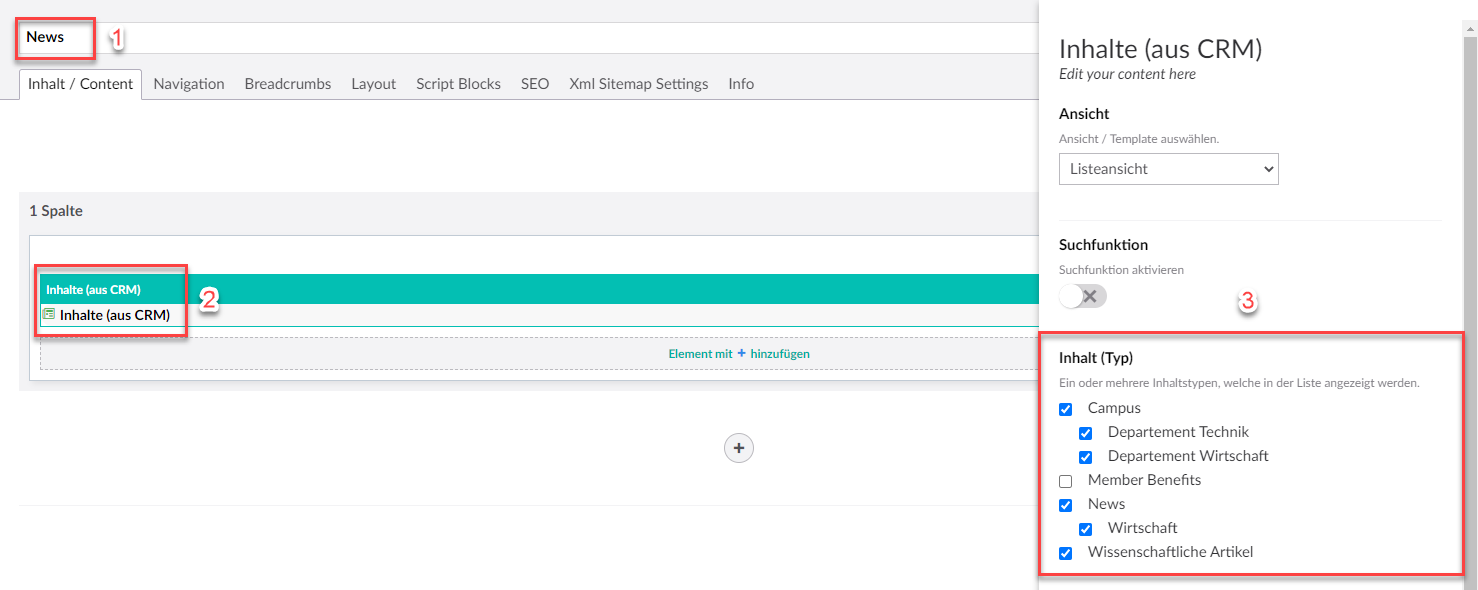
The categories should now appear on your platform and be functional.